Professional Kitchen Cabinet Painters
We Paint kitchen cabinets to look new again!
Edmonton to Lloydminster and all surrounding areas.
Call or text: 780-815-3039
Our Process
- Alignment of doors and drawers;
- Remove hardware, label doors & drawer and take to our shop for processing;
- Clean, sand, patch and repair;
- Vacuum;
- Prime and painting;
- Caulk seams and cracks and allow to cure;
- Sand and prime again where needed;
- Paint kitchen cabinets;
- Reassemble;
- Install new felt bumpers on doors and drawers.
Alignment
We restore every kitchen to look new again! Part of our process is making sure the doors and drawers are evenly spaced, aligned and straight looking.

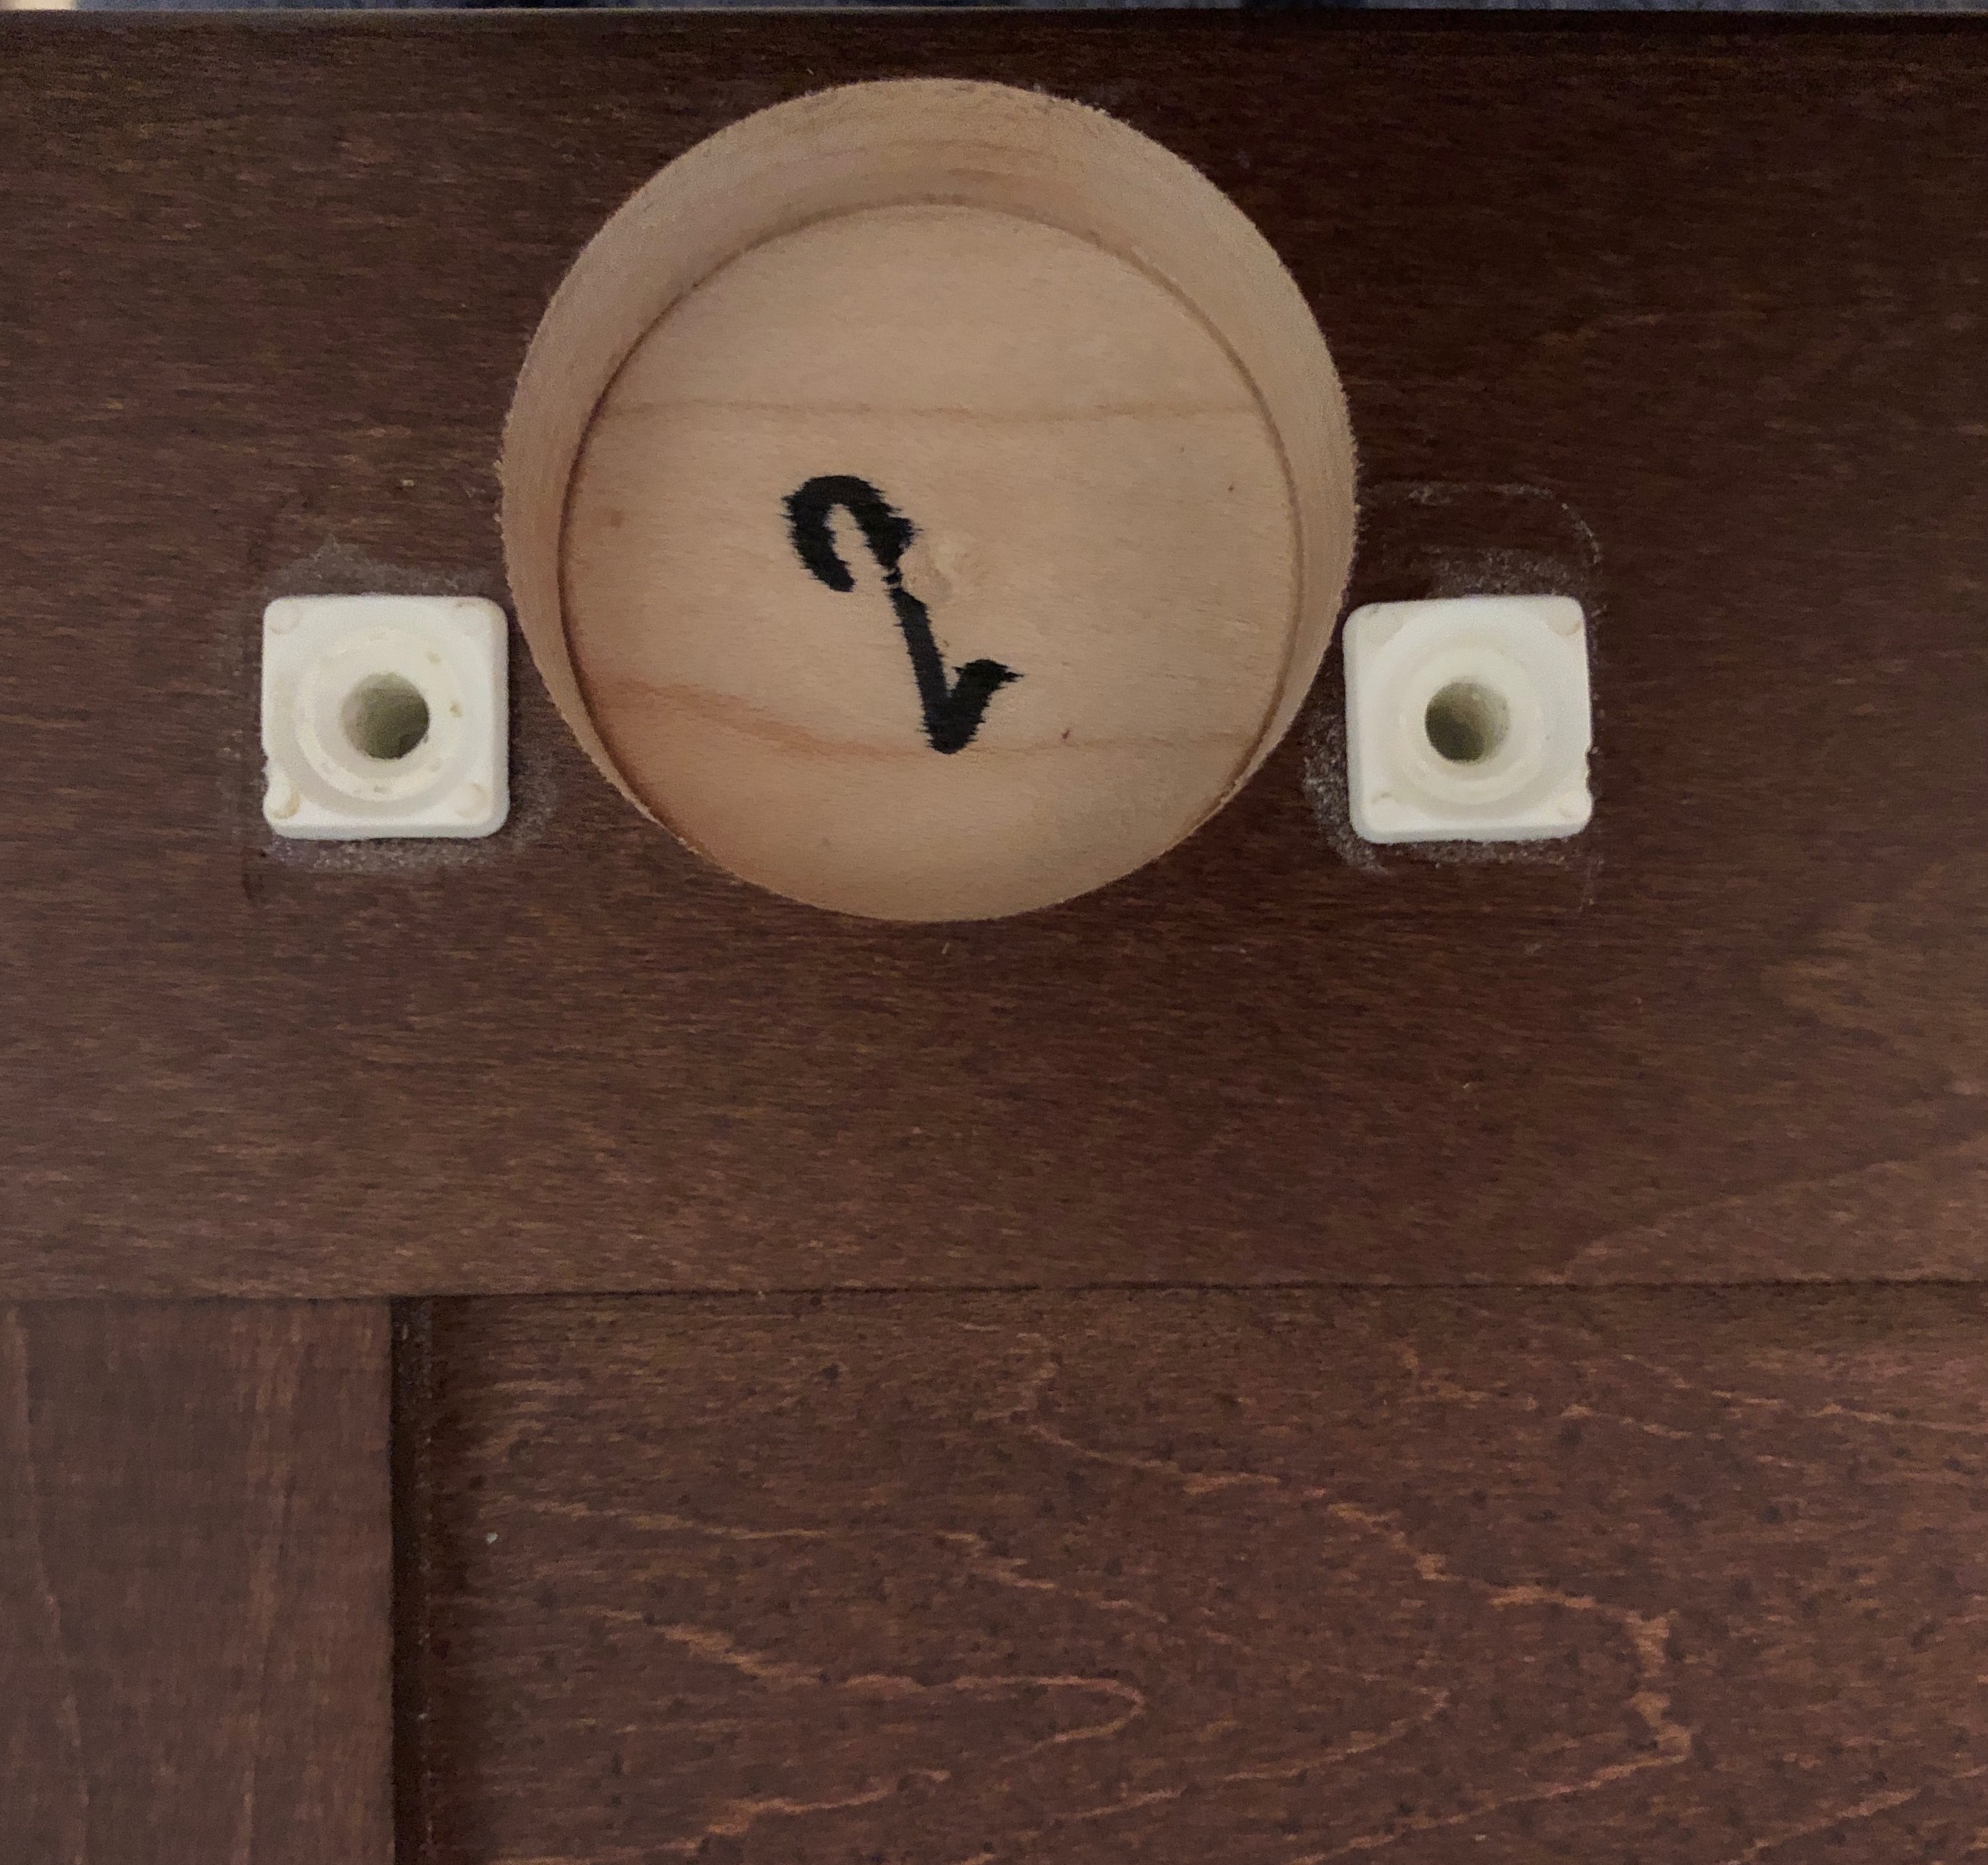
Disassembly and labelling
Labelling underneath the hinges ensures the freshly painted doors and drawers fit perfectly back together again.
Sanding
We sand everything down to clean wood so paint bonds properly and the cabinets look like new again.
Watch our detailed video on how and why we sand kitchen cabinets so thoroughly.
Dealing with dust
Our process is very clean. In fact you don't even need to empty your cupboards!
We use Festool hepa filter vacuum sanders and their world class air extraction system on-location and in our shop. Clean dust free surfaces ensure a satin smooth finish.
Priming and painting
We flood coat shellac based primer sealer in a variety of methods until the grain is filled and ready for paint. The deeper the primer penetrates, the better the bond. The better bond, the better the finish! We pay attention to how we prime and paint everything.
Caulking and cure time
Once everything has been primed we caulk the seams and gaps and allow it all to cure for at min 24 hours. Caulking kitchen cabinets is an art in itself. Old cabinet can have a lot of gaps that don't look good if you can see old stain between these gaps. Smooth seamless high quality caulk that closes these gaps insures your cabinets will look like new for years.
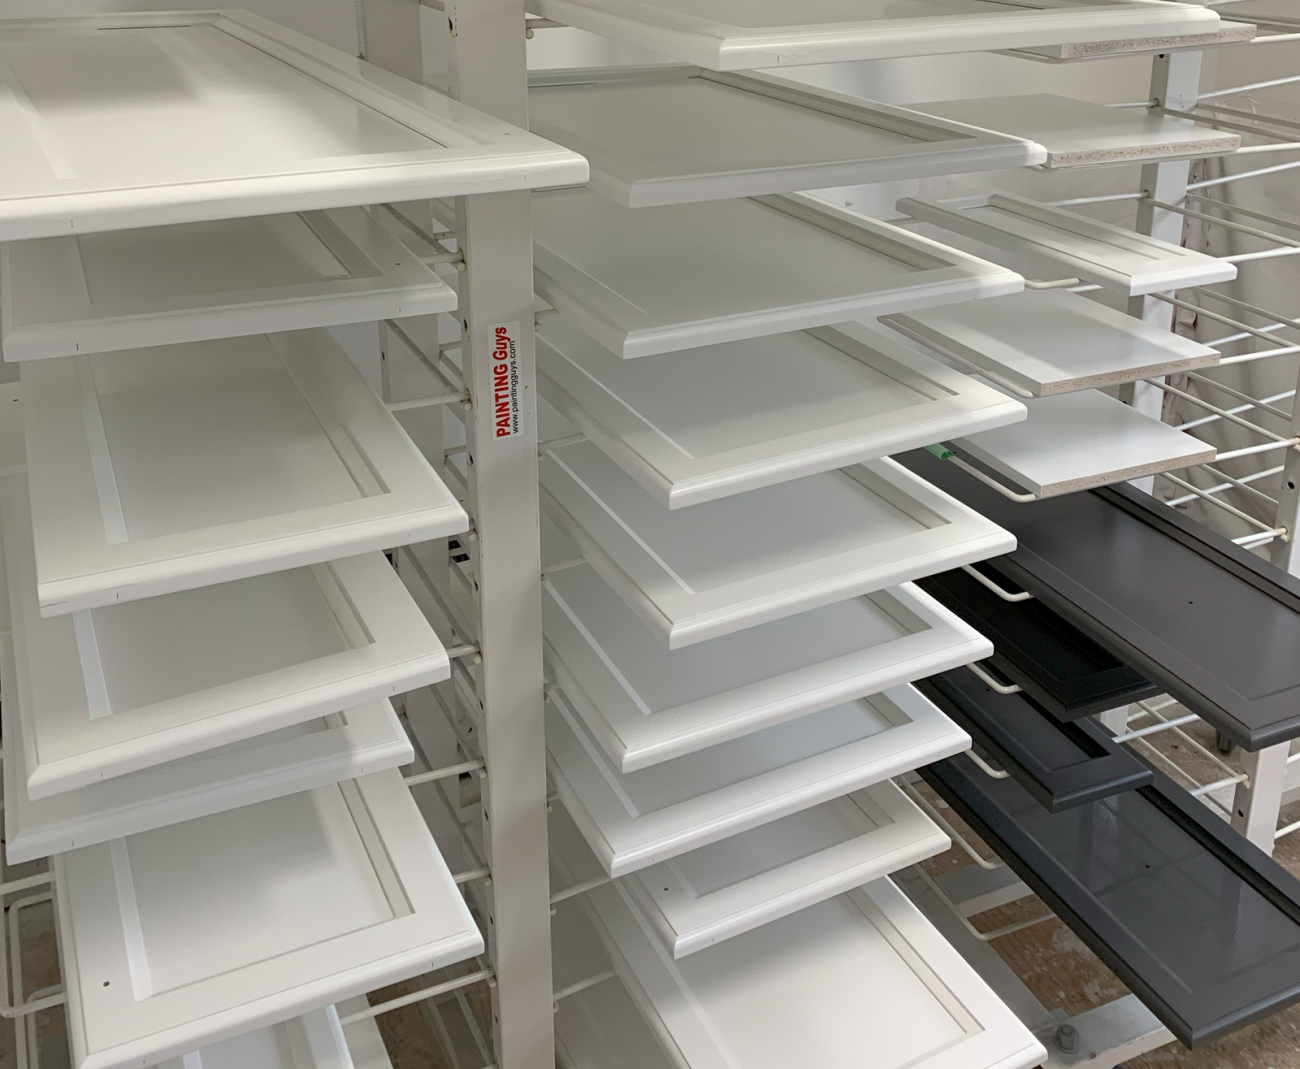
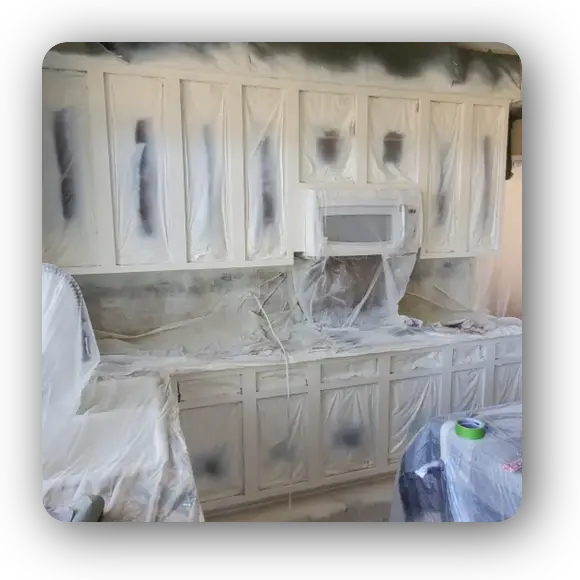
Spray painting
Freshly spray-painted doors and drawers are placed on drying racks in our vented dust-free shop. This process ensures a satin smooth finish!
Painting glass doors, cupboards and shelves
Inside cupboards are usually laminated with a durable surface so it's not usually necessary to paint them. However, if they are open shelves or behind glass doors, we paint the inside of those as well.

Painting the exterior boxes
The exterior sections of the kitchen cabinets, which include the face frames, any exposed cupboards, shelving, crowns, valances, gable ends, kick plates are always done by hand before finish coating.
Our kitchen cabinet painting process is very clean. In fact, you can use your kitchen the entire time and do not need to even empty your cupboards!
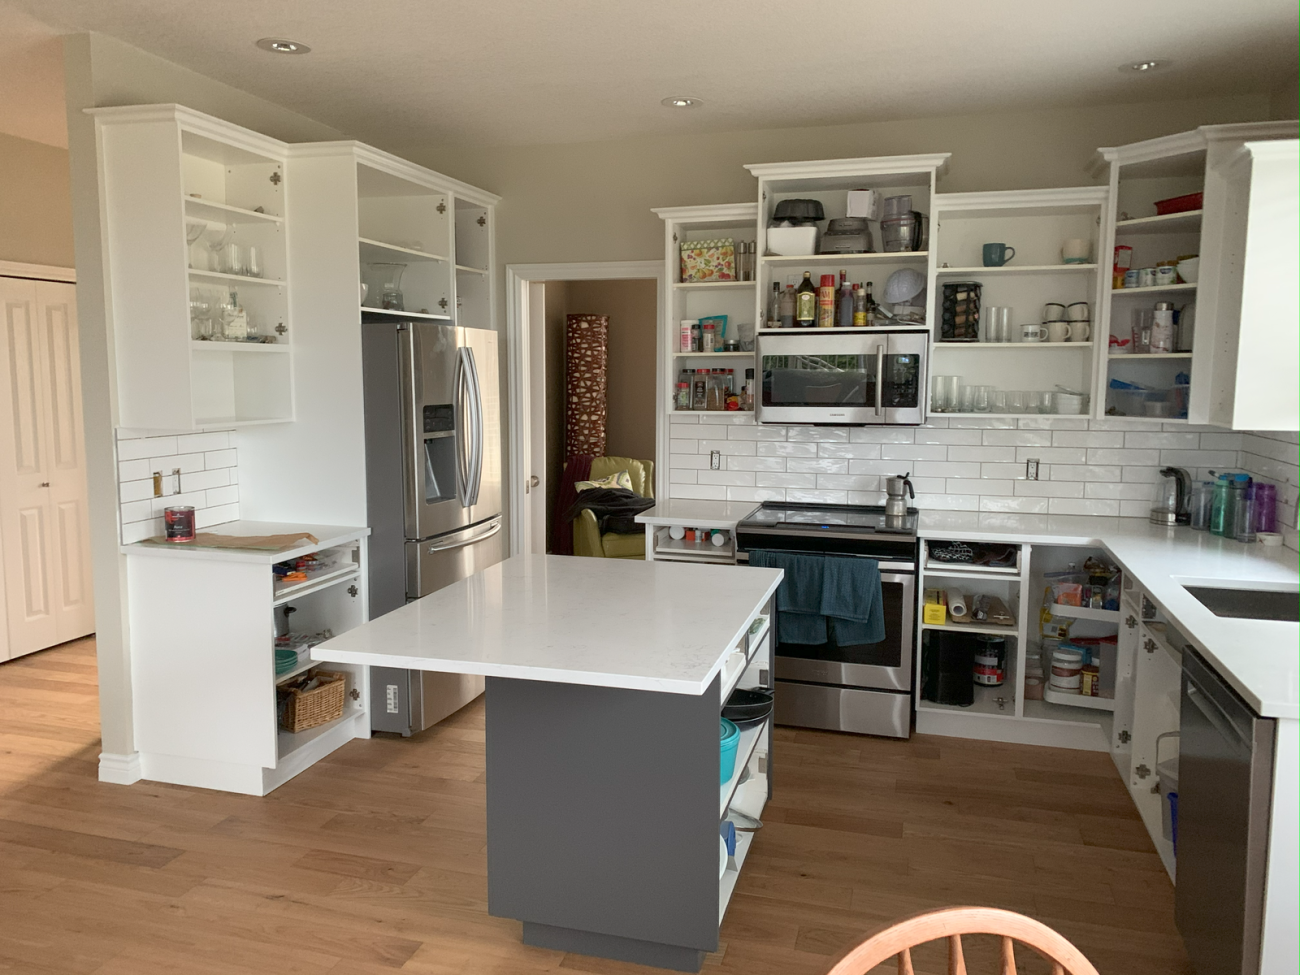
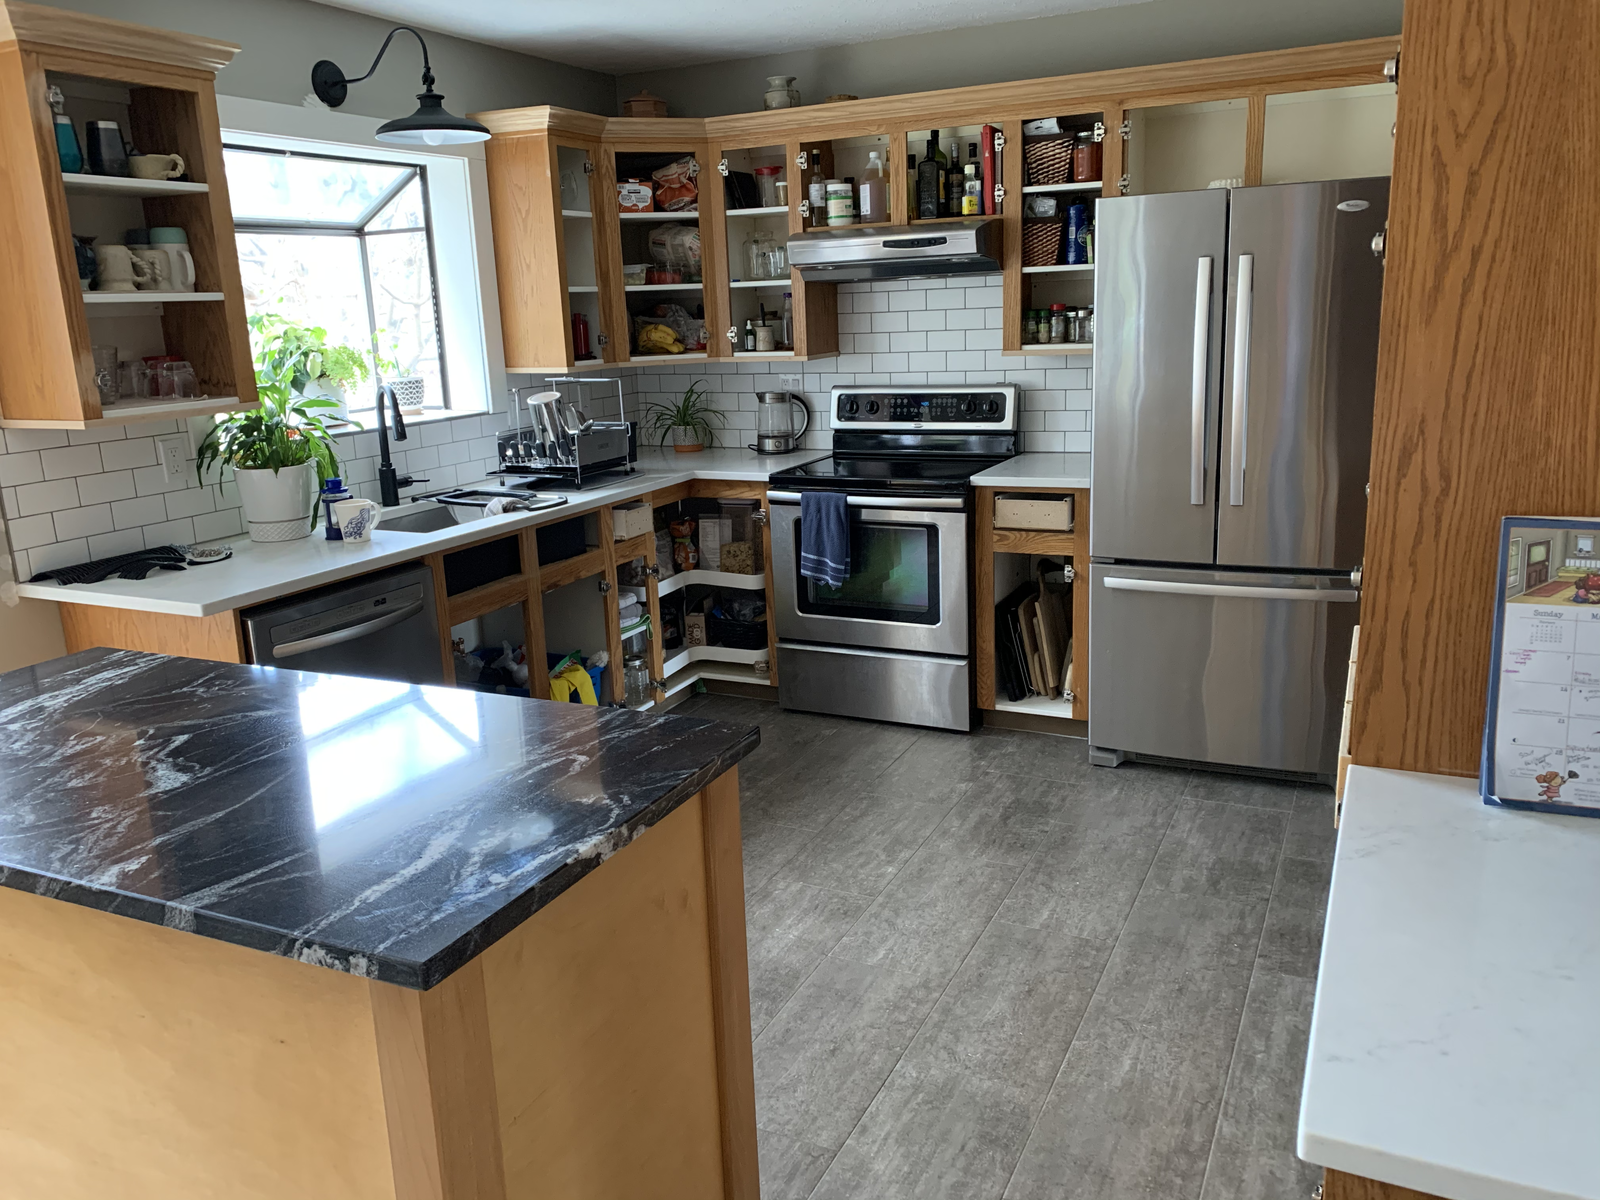
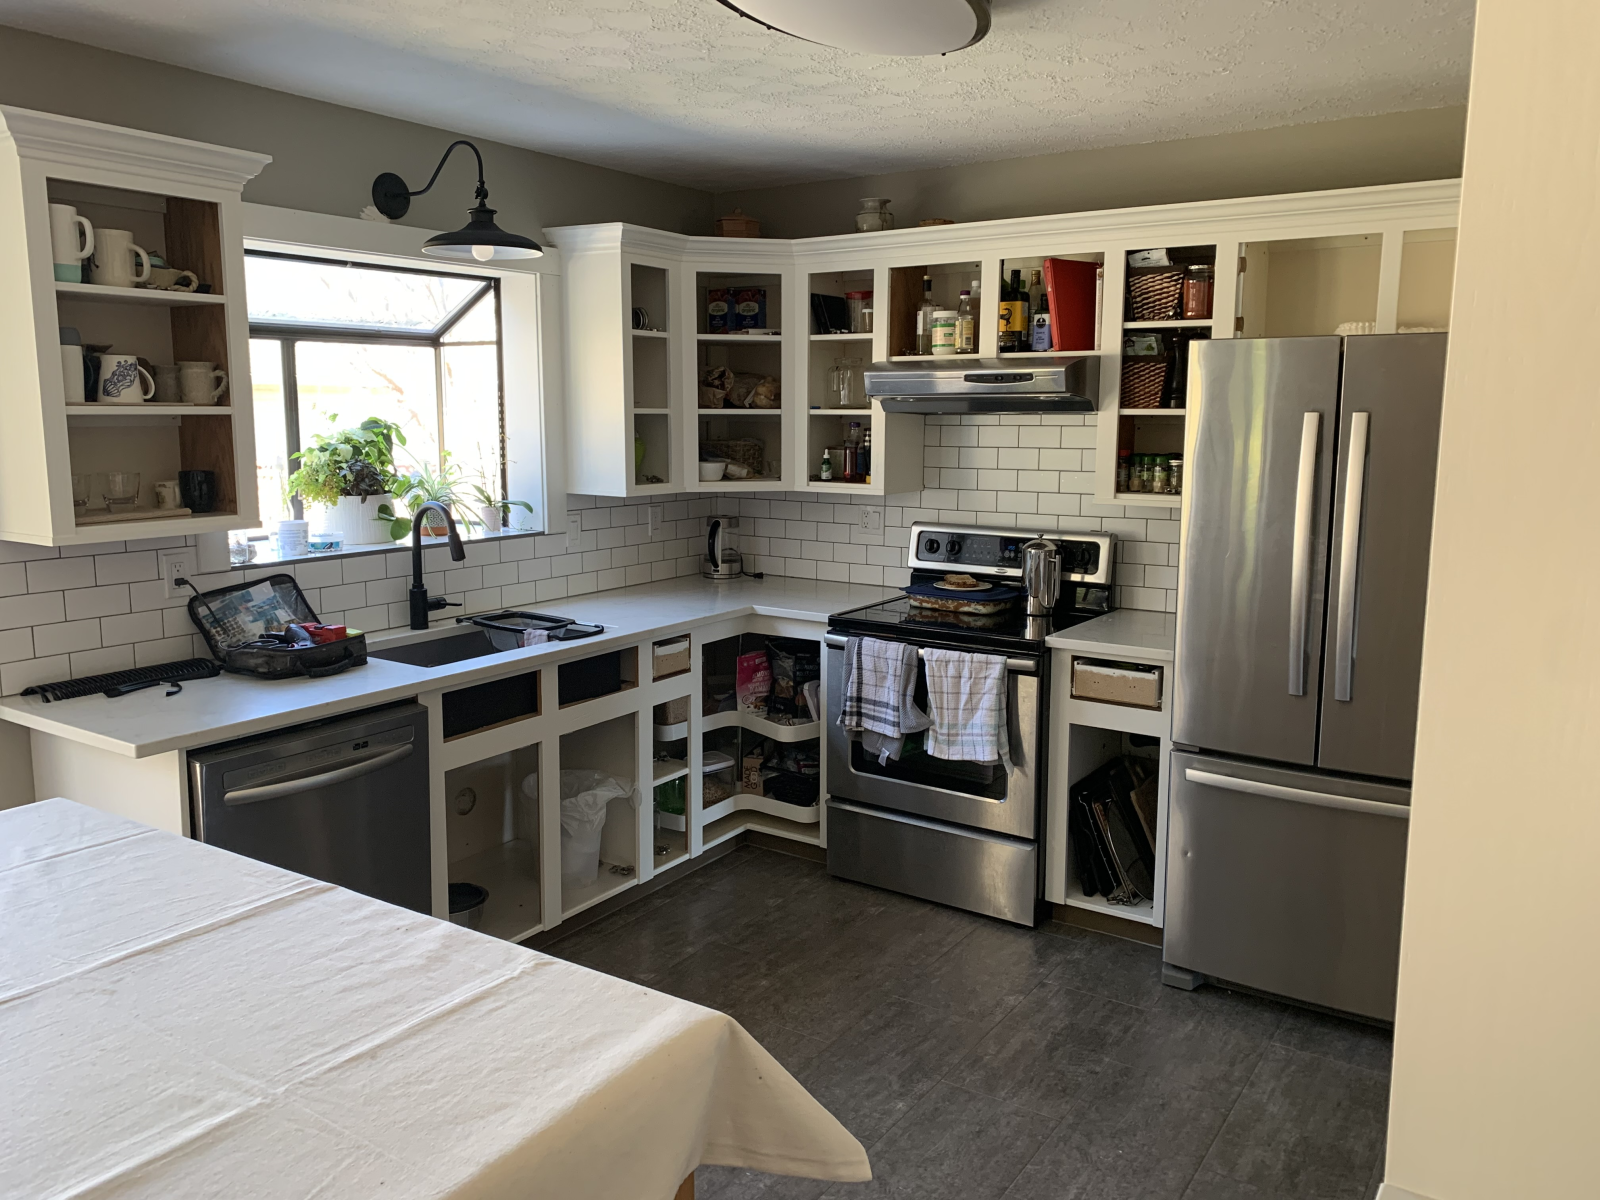
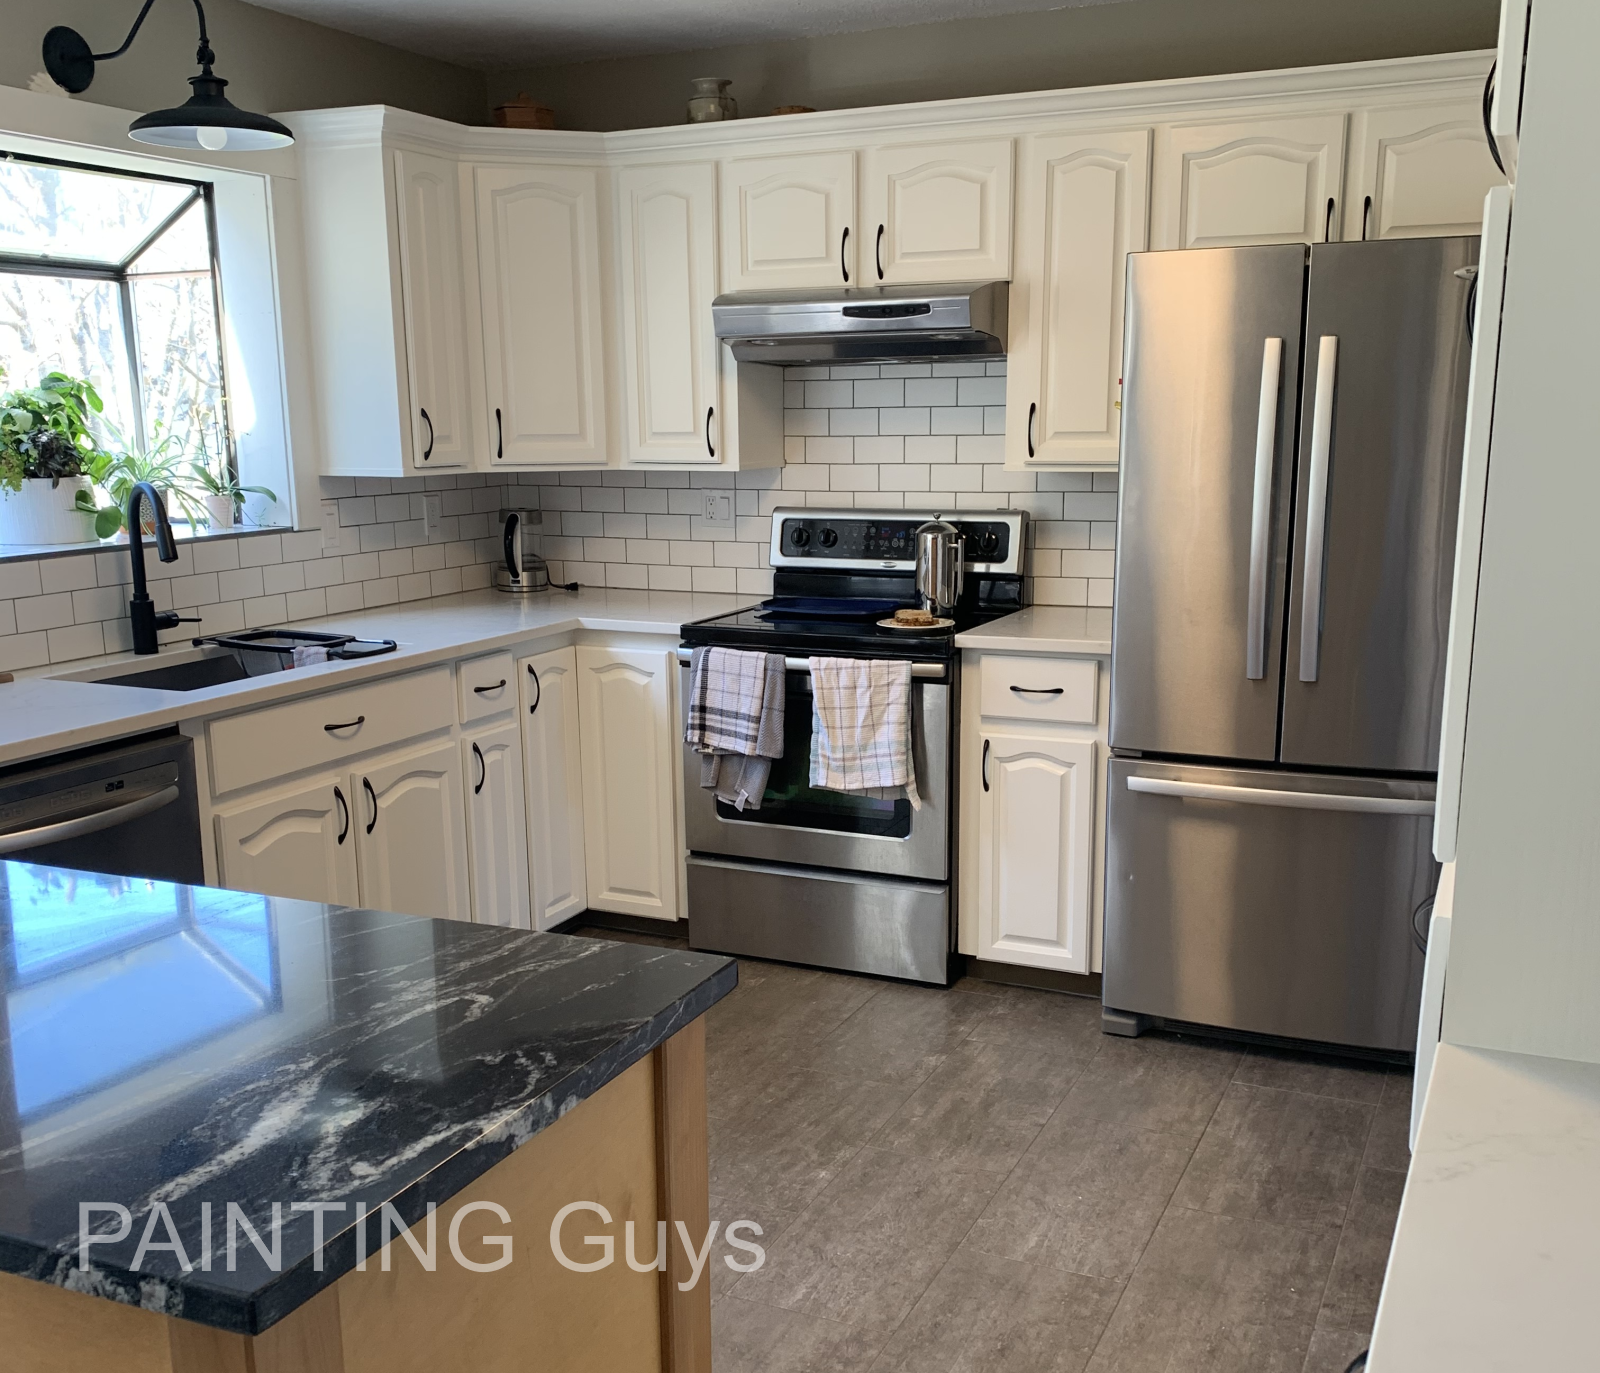
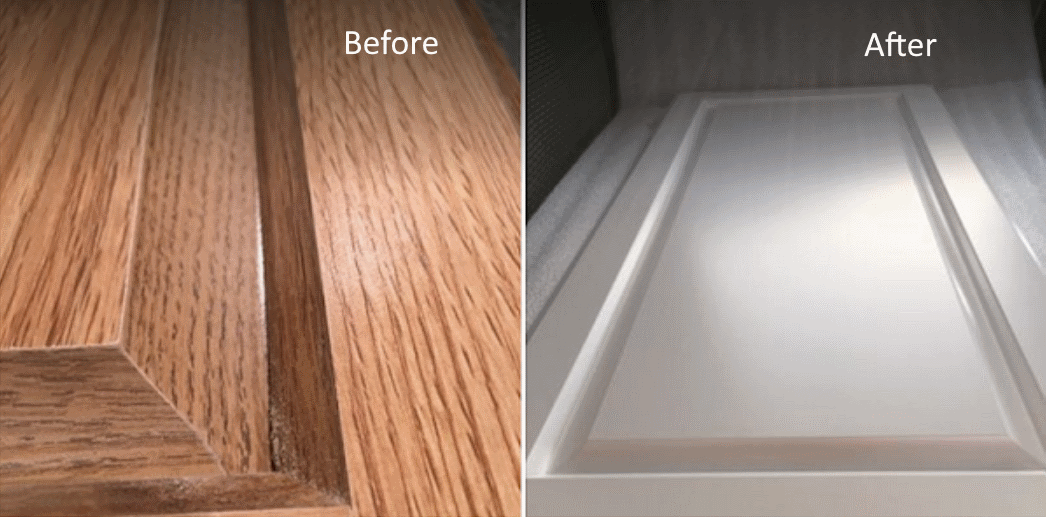
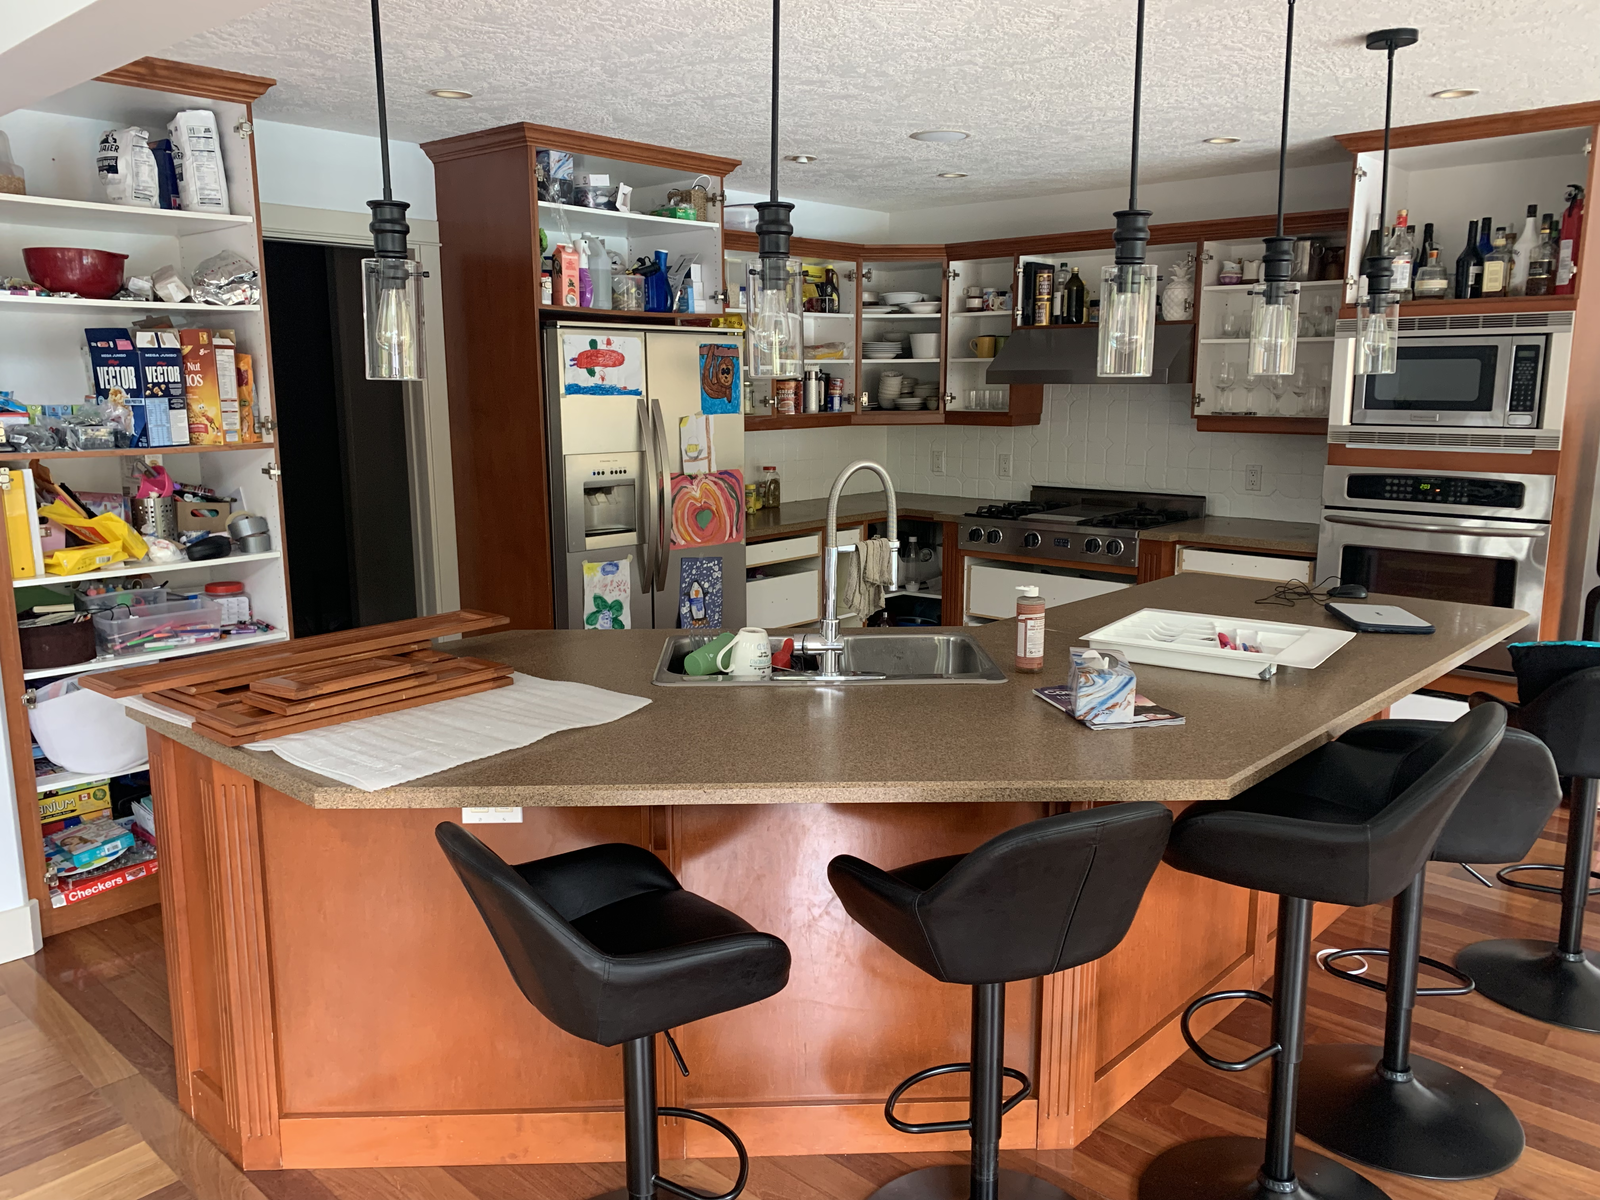
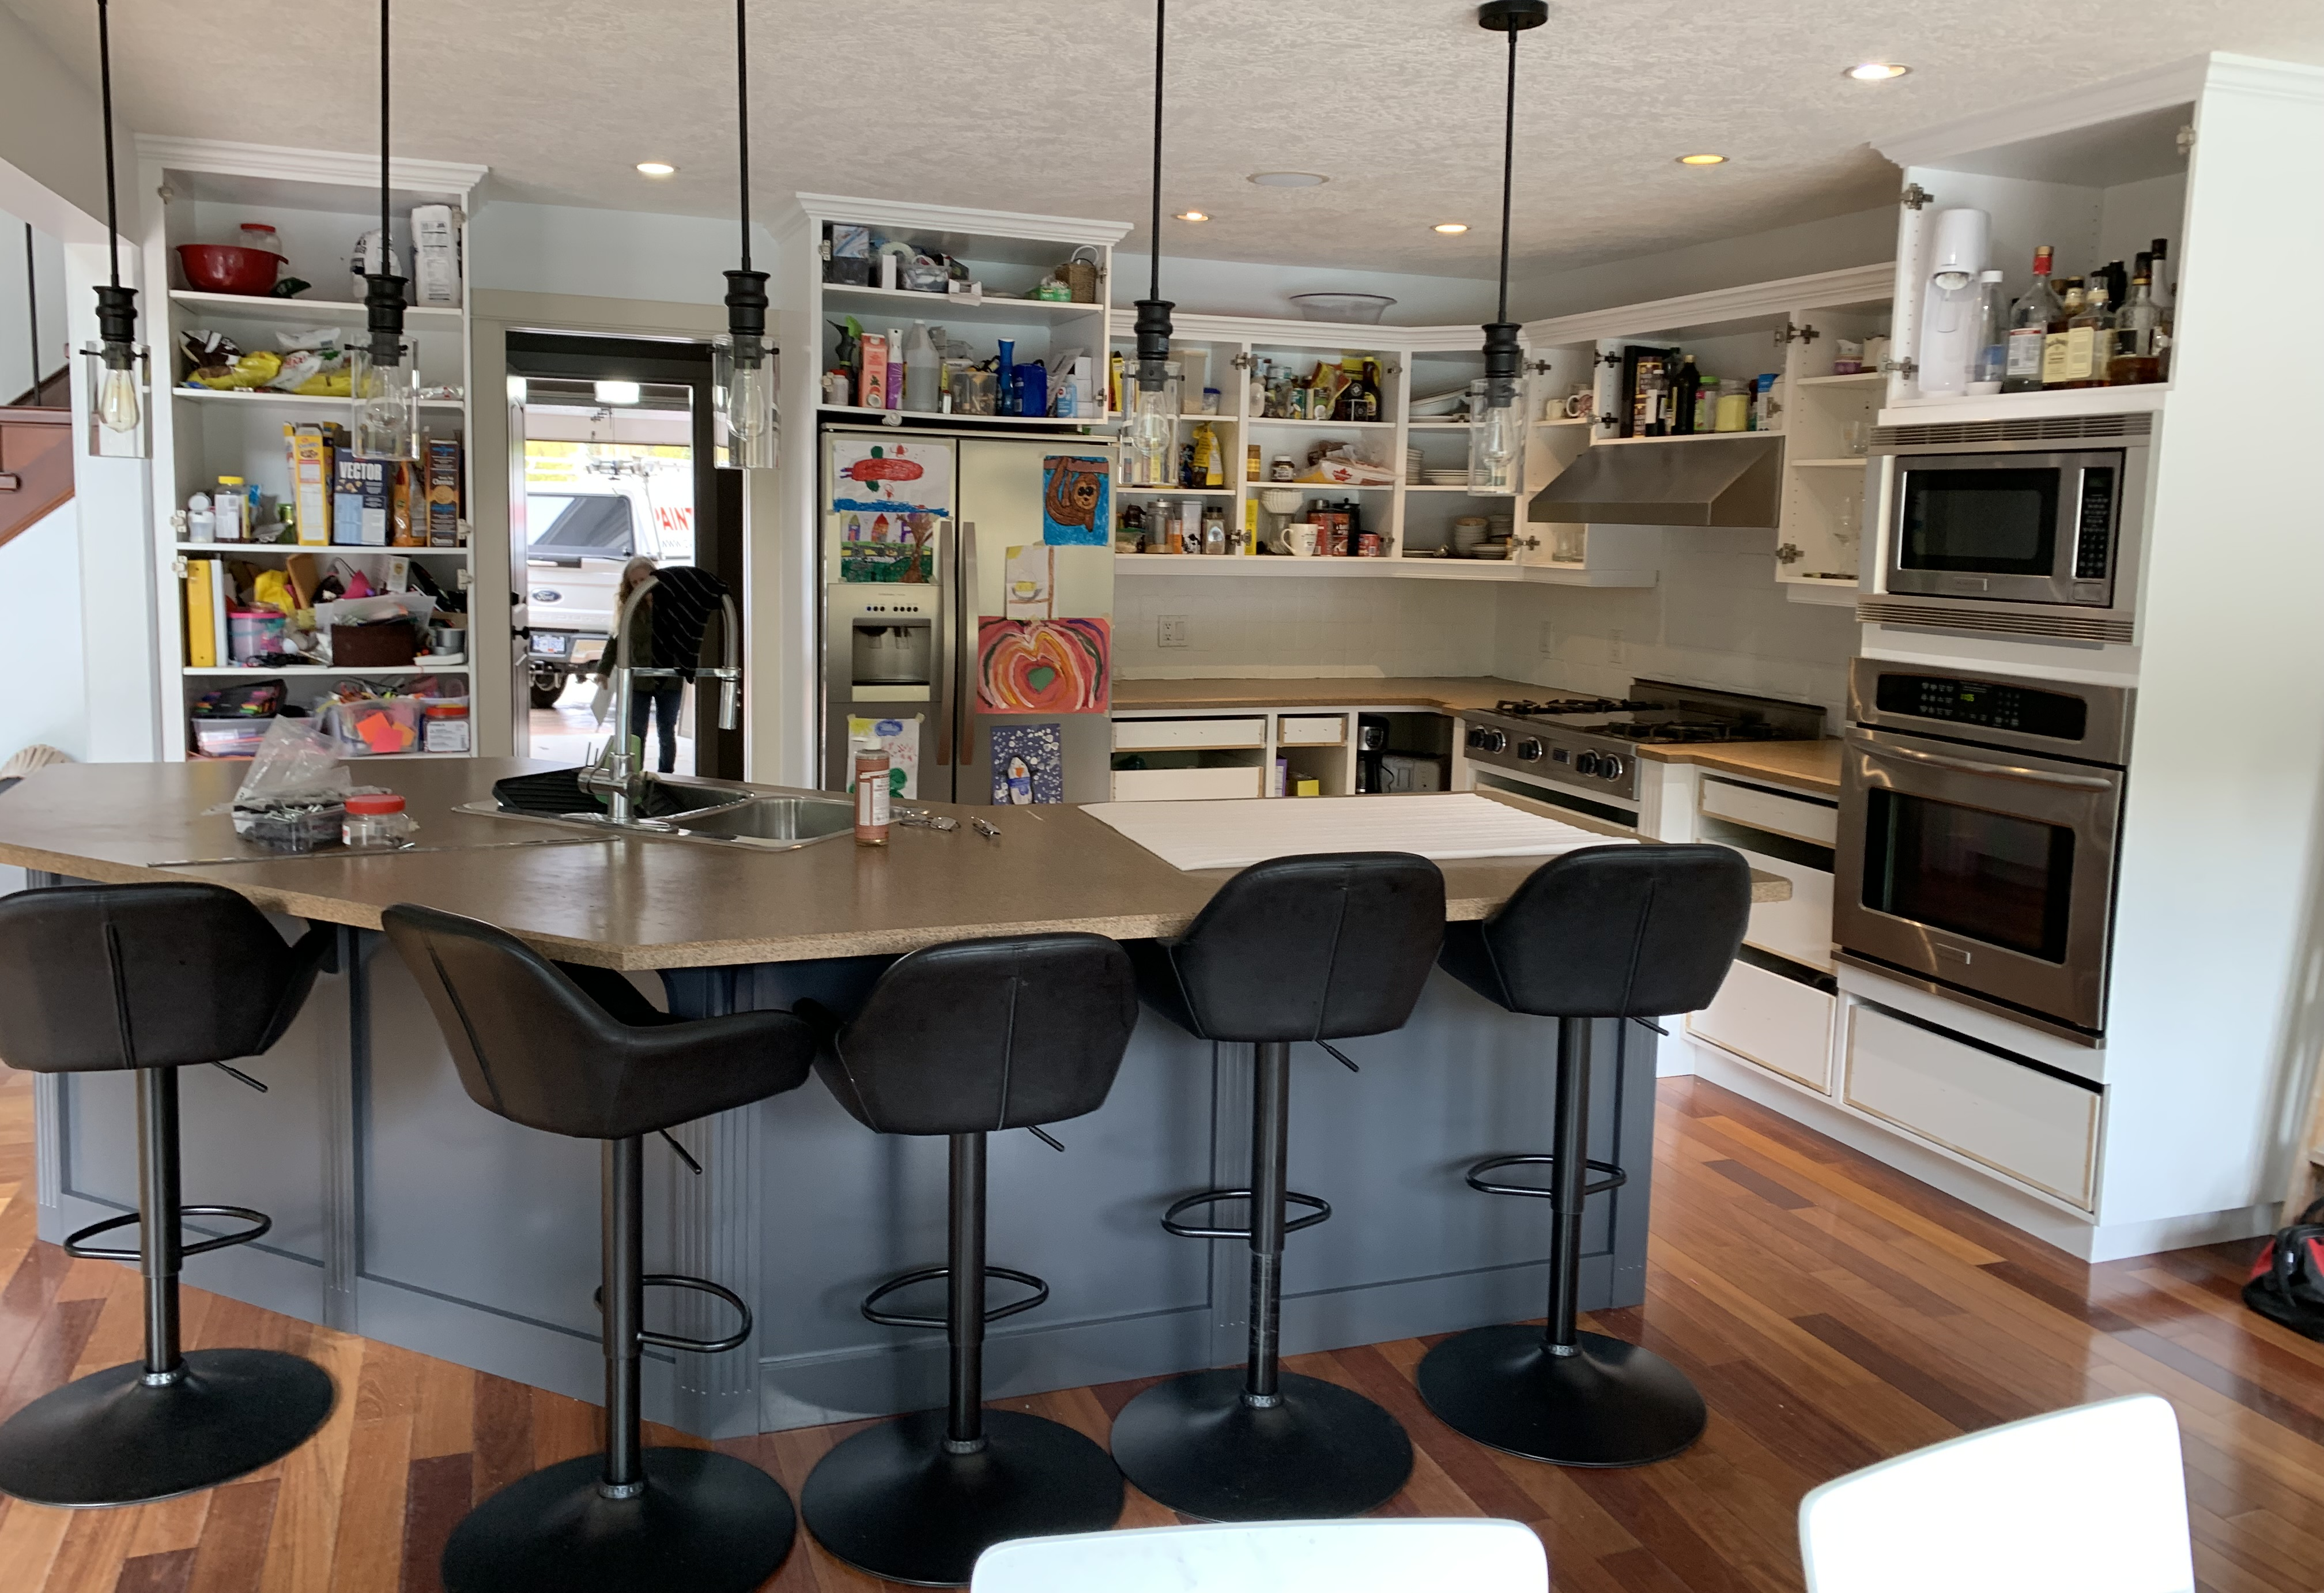
Before & After
Stage 1

Stage 2
Stage 3
Stage 4
Average Cost
The average cost to paint kitchen cabinets is between $4,000 and $6,000. This includes, cleaning, sanding, spray finishing, all labour, paint, supplies & tax.
Costs are based on:
- Number of cabinet doors and drawers there are in total;
- Type of wood (oak, maple, pine, melamine etc);
- Profile and design of cabinets;
- One or more colours;
- Overall condition.
Can all types of cabinets can be painted?
Yes! All wood products including laminates, melamine and even thermofoil cabinets can be beautifully painted.
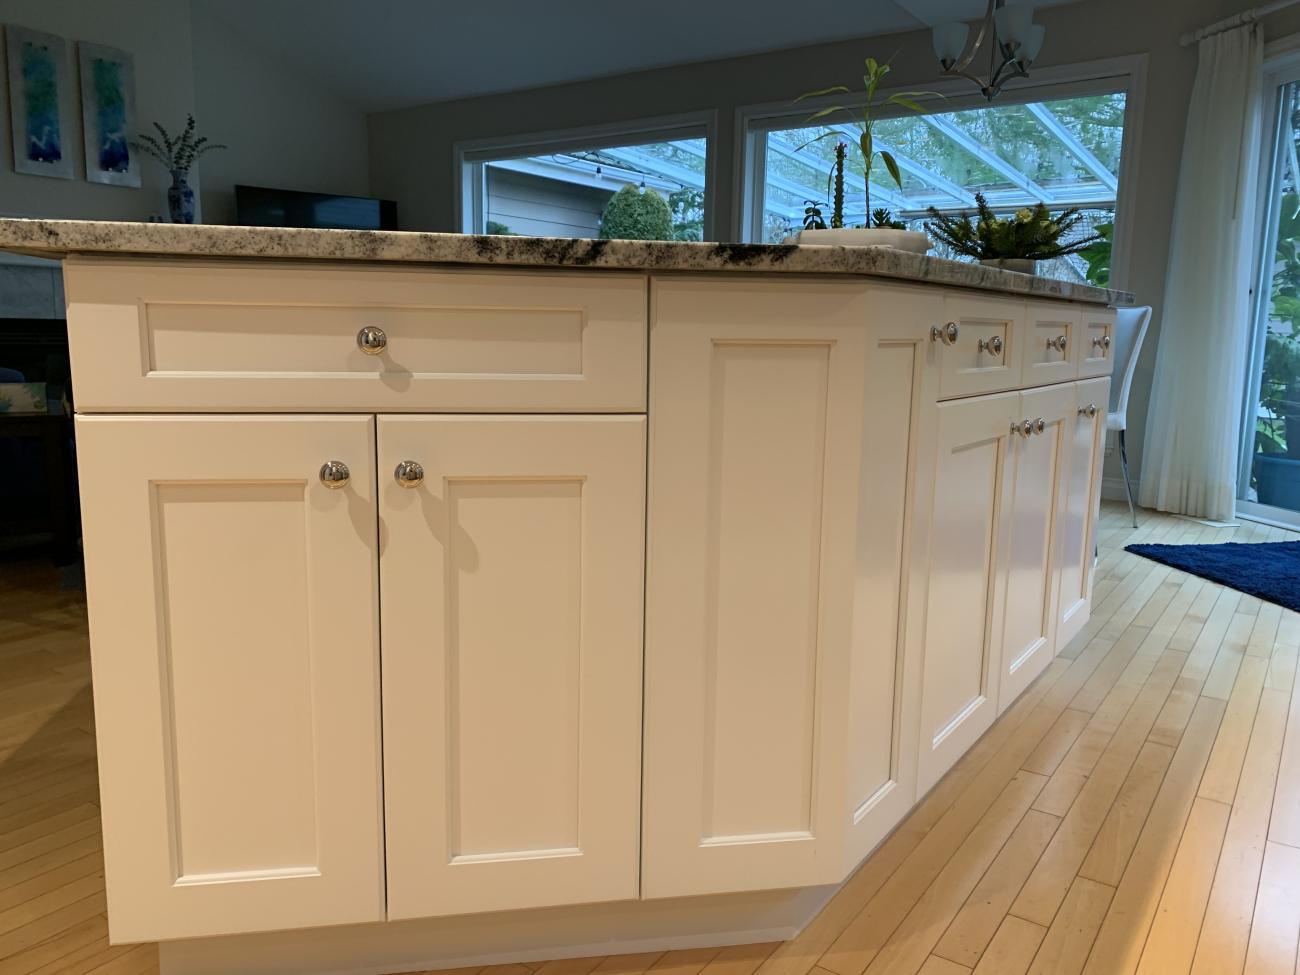
Paint Kitchen Cabinets
Paint Islands
Kitchen islands painted a different colour from your main cabinets can look fantastic!
Paint Bookshelves & Bookcases

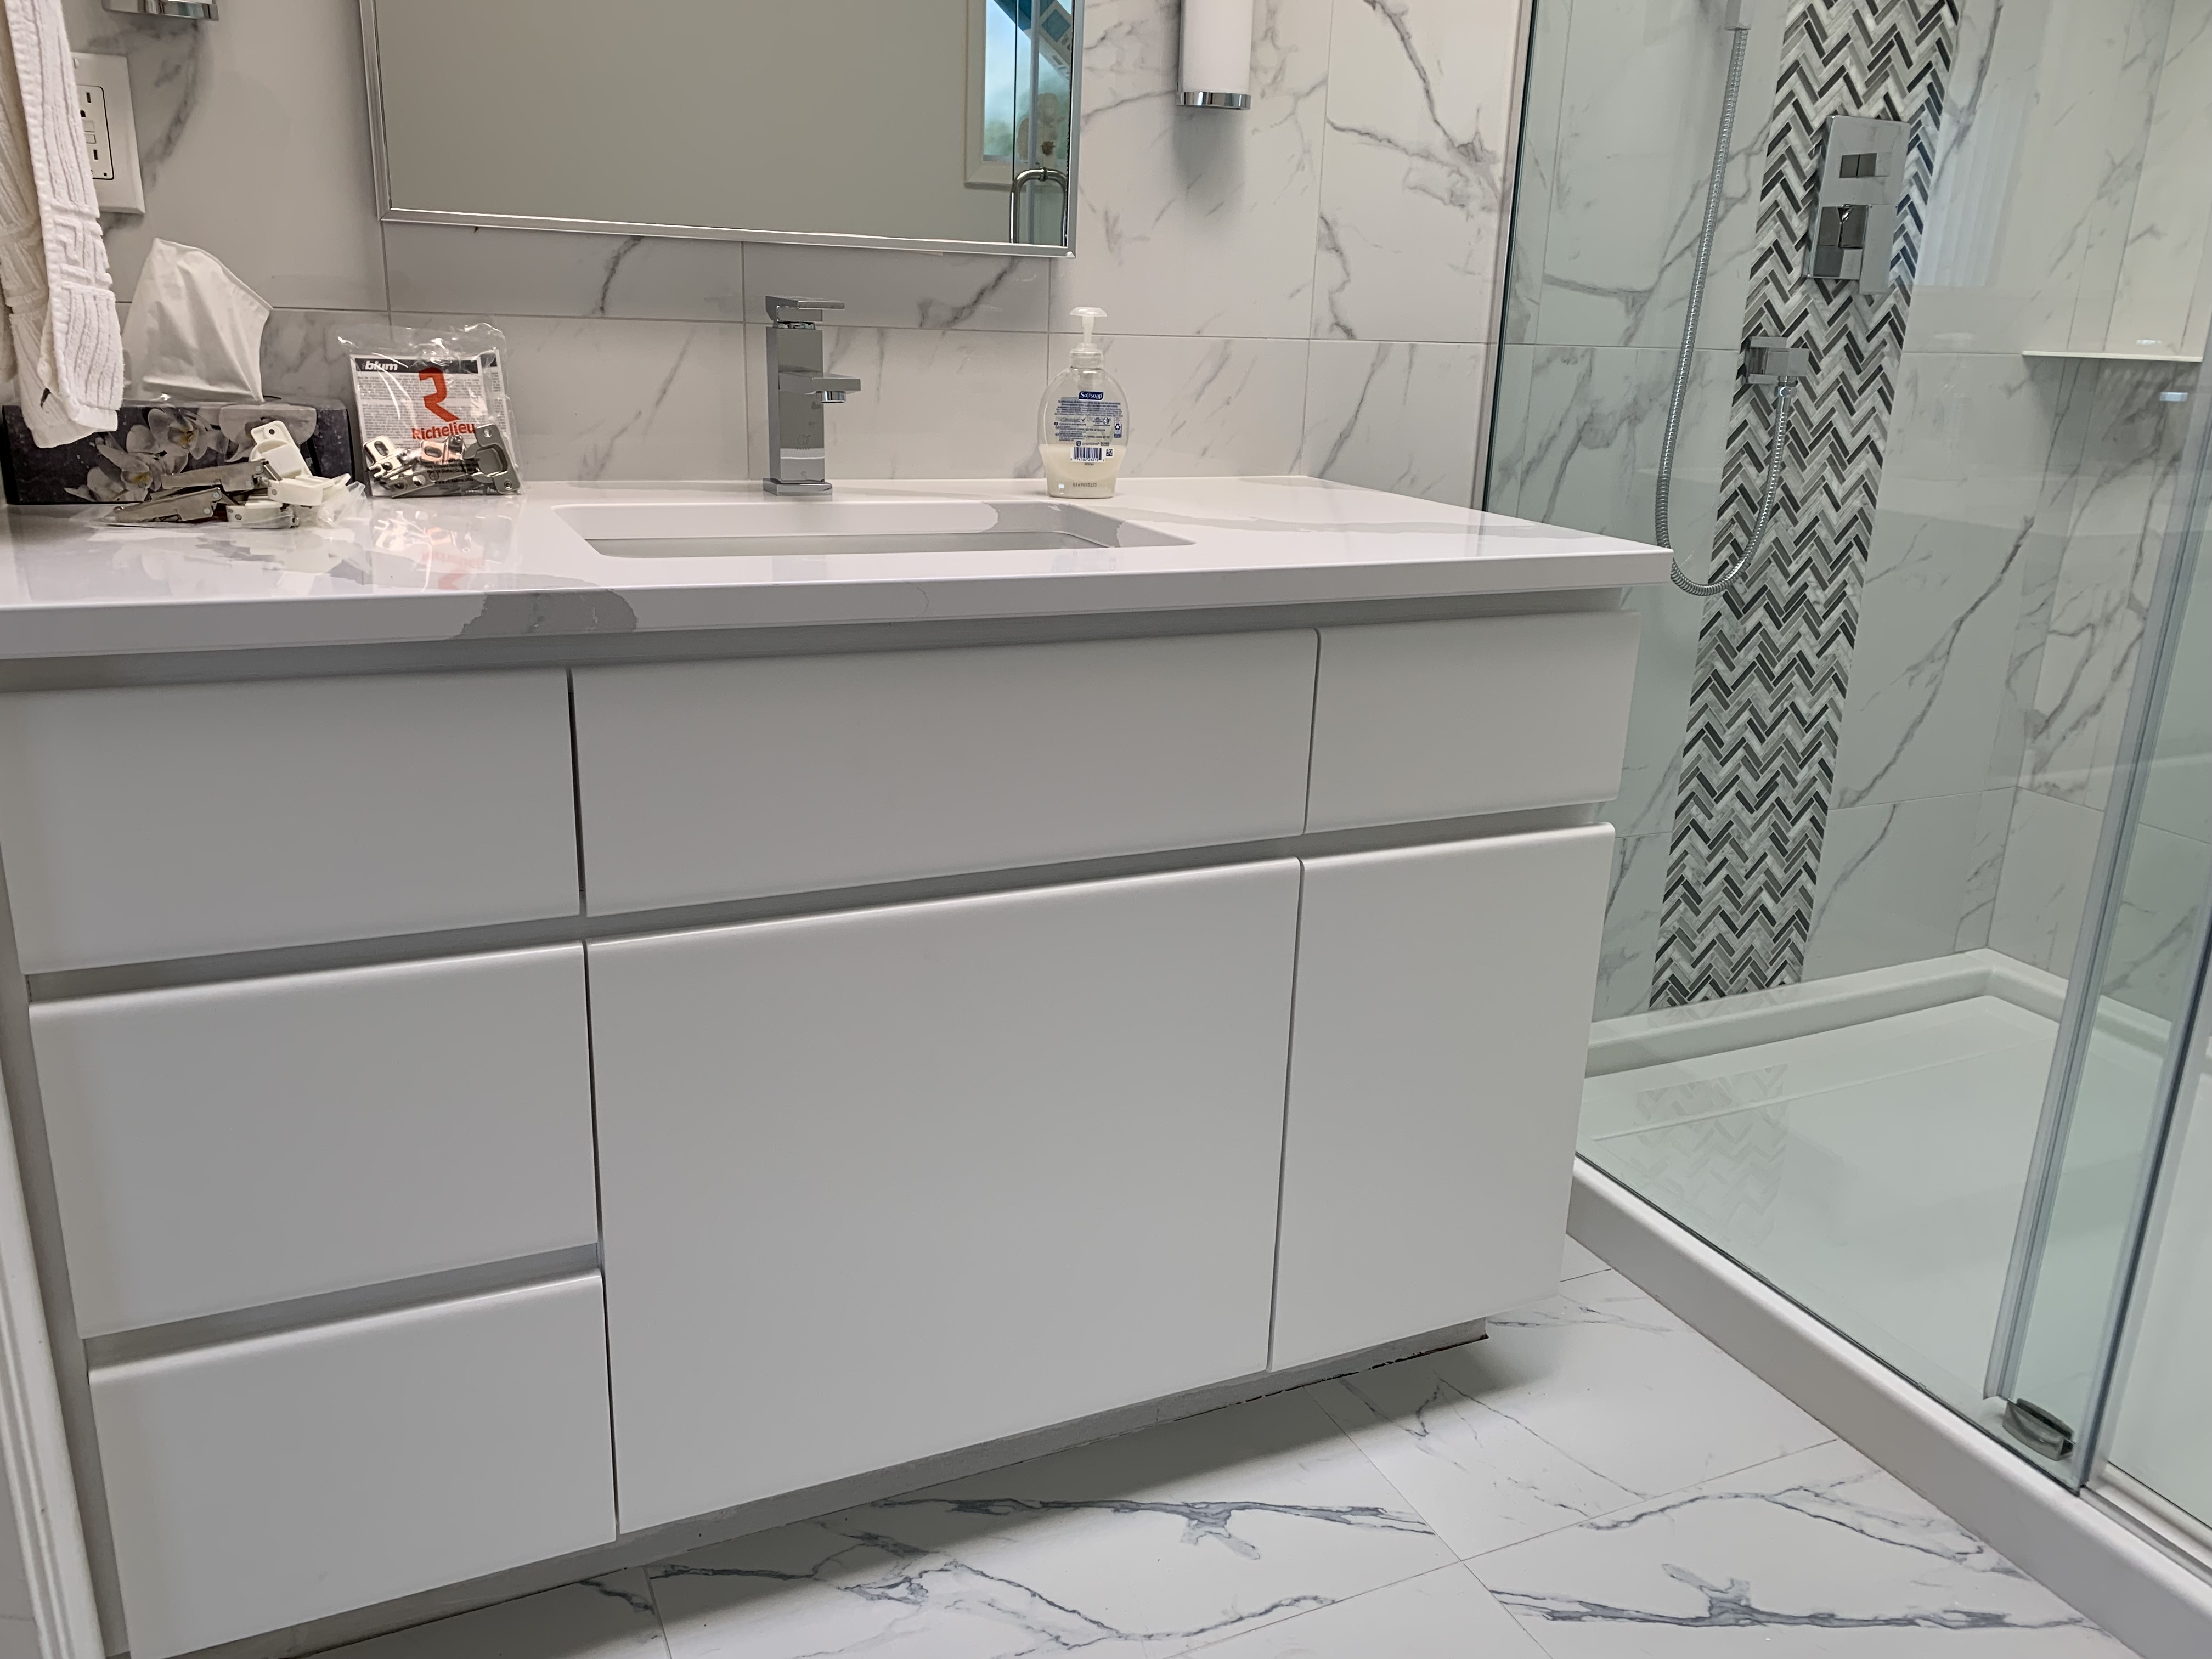
Paint Bathroom Vanities
Painting the exterior boxes
The exterior sections of the kitchen cabinets, which include the face frames, any exposed cupboards, shelving, crowns, valances, gable ends, kick plates are always done by hand before finish coating.
These sections are cleaned, sanded, sealed and undercoated in place so they do not expose old stain, bleed or any gaps around the walls and ceiling. This is why you do not remove these section and why you take the time to allow everything to cure.
Other than having cabinets without the doors and drawer fronts on them, you are able to use your kitchen throughout our entire process and you do not have to empty the cupboards!
What NOT to expect 🚫
We DO NOT Paint cupboards like this! 👎🏻
Spraying cupboards on walls 🚫
Residential painting contractors that include "kitchen cabinet painting" as part of their painting services will set-up a "spray-net" (barrier) to help reduce dust and toxic fumes from entering the house.
Once they have the barrier up they mask off the cupboards and shelving so they can spray paint everything without getting paint all over the ceiling, walls, inside the cupboards, flooring etc.
Why we DO NOT spray cupboards on the walls 🚫
- Spraying cupboards on walls creates excessive paint build-up and over-spray from the back pressure. You can reduce this back-pressure using an HVLP but the problem still exists;
- Spraying cupboards on the walls looks like they were repainted apposed to being bought new.
- Spraying cabinets on the walls creates a disgusting amount of dust and fumes.
Summary
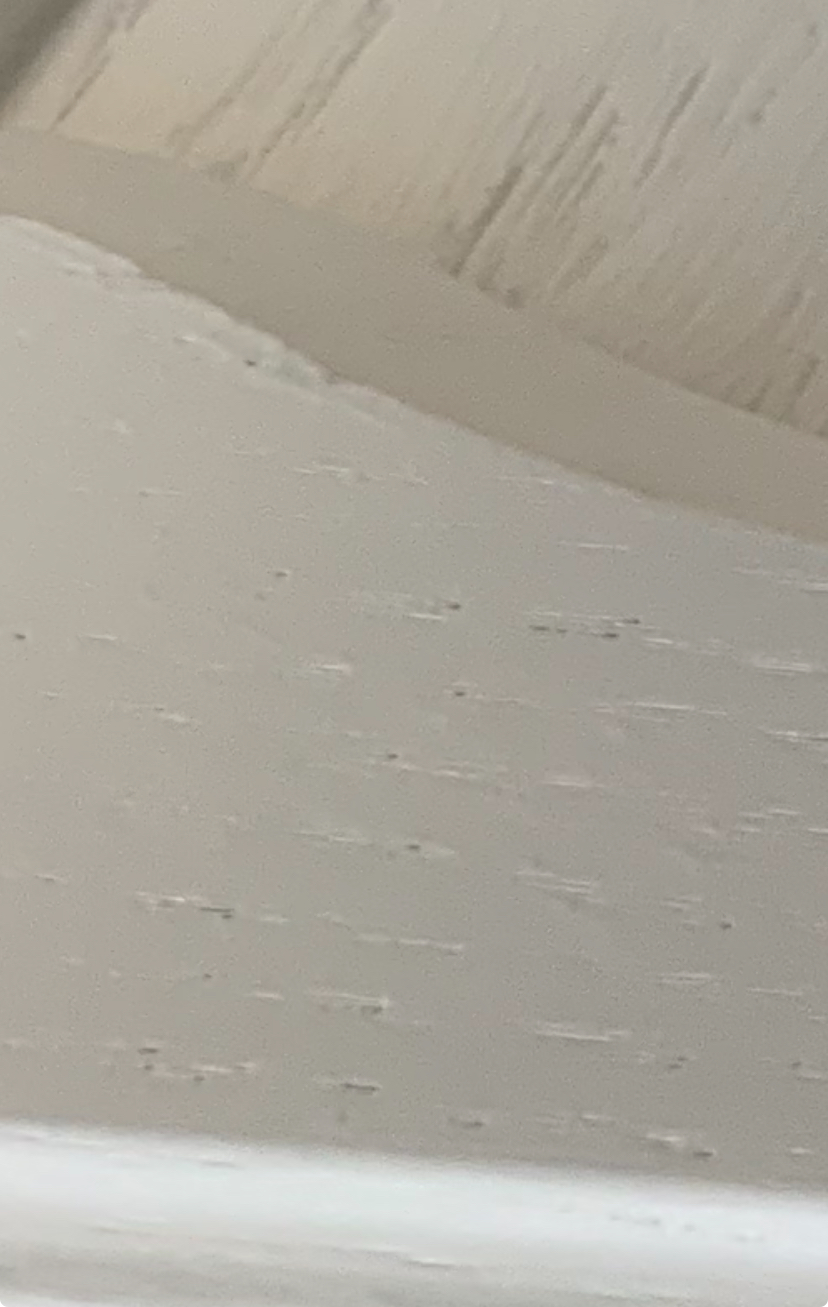
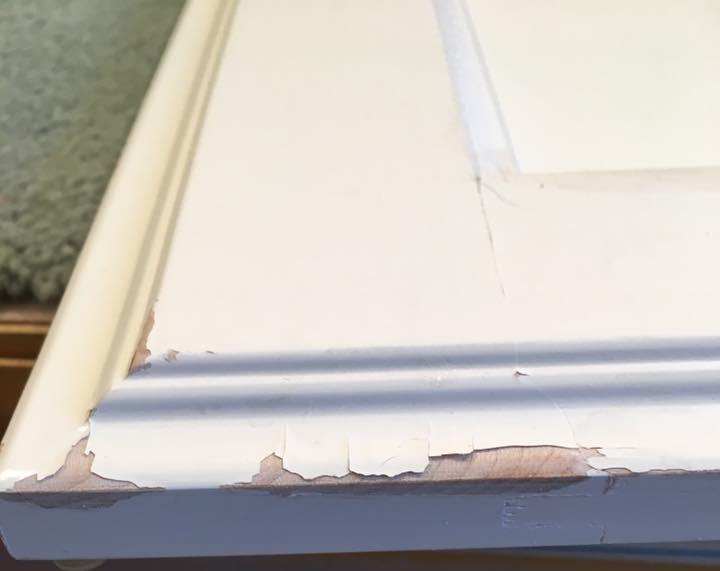
When too much paint is sprayed on the cupboard boxes paint chips much easier, breaks between face frame seams and joints and overall, look cheap and DIY. Spraying cabinets while on the walls is especially problematic when painting all open grain wood such as oak, ash, and hickory. Closed-grain woods such as maple, walnut, and cherry have pores that are not visible to the naked eye.
Cupboard boxes and frames always need to be hand primed to avoid the open grain holes from looking like this
Painting crowns, valances and trim
When the goal is to repaint any previously stained cabinet "to look new again", we DO NOT remove crowns, valances or any trim that can show old stain between cracks, joints and seams.
Sealing everything in tack is how we do it. We always use high-quality paint-able products that DO NOT shrink at different cure speeds of the top coat.
Always allow products enough time to cure before finish coating. You do not want seams to crack open 12 months down the road.
Quality vs Speed
We DO NOT use chemical based products to speed up the drying and curing process (formulate the coatings). Quick dry chemicals tend to be more brittle and problematic to cracking around seams and joints as seen in the example below. This is why we take time to prep and refinish cabinets properly using latex and acrylic based products.
The down side is slower curing products is they do take a few days to cure between our steps but in the long run these products also stands the test of time! 💪
They remain flexible and stable for years which is particularly important in climates that go from very dry conditions to humid (expanding and contracting).
Lacquer vs Paint, which is better?
Below is an example of why we don’t use pre- or post-catalyzed lacquer (epoxy formula). Example of a pigment lacquer cabinet door finish failing only after a few years.
Prepping for climate and humidity changes
Most cabinet door and drawer panels are designed to expand and contract throughout the year. This is purposely done to prevent cracking between the profile and the panel.
When shrinking happens during the dry seasons we make sure our paint is underneath these seams and joints so you never notice old unpainted stain from suddenly appearing.
Dealing with stain bleed and climate changes
When you paint over any previously stained cabinet door: example shade of white, to prevent any old stain from becoming noticeable we always prep cabinets in a specific way to prevent old stain from suddenly appearing.
To prevent this from happening, we always clean gaps and seams thoroughly, air blast debris out and then hand brush a flood coat of shellac so it soaks deep into the wood. This method is hands down the very best way to paint kitchen cabinets.
When TO caulk and when NOT to caulk
Sometimes we caulk and other times we do not. Every kitchen is designed and built differently.
Some areas have large gaps, others are built tight but you always need to get primer deep into the gaps. This insures top coats adheres to the primer and the primer adheres to the wood. This process prevents cracks and seams from exposing old stain.
The better you clean, prep and prime everything, the less chance you will see old stain or any cracks from suddenly exposing old stain from bleeding through.
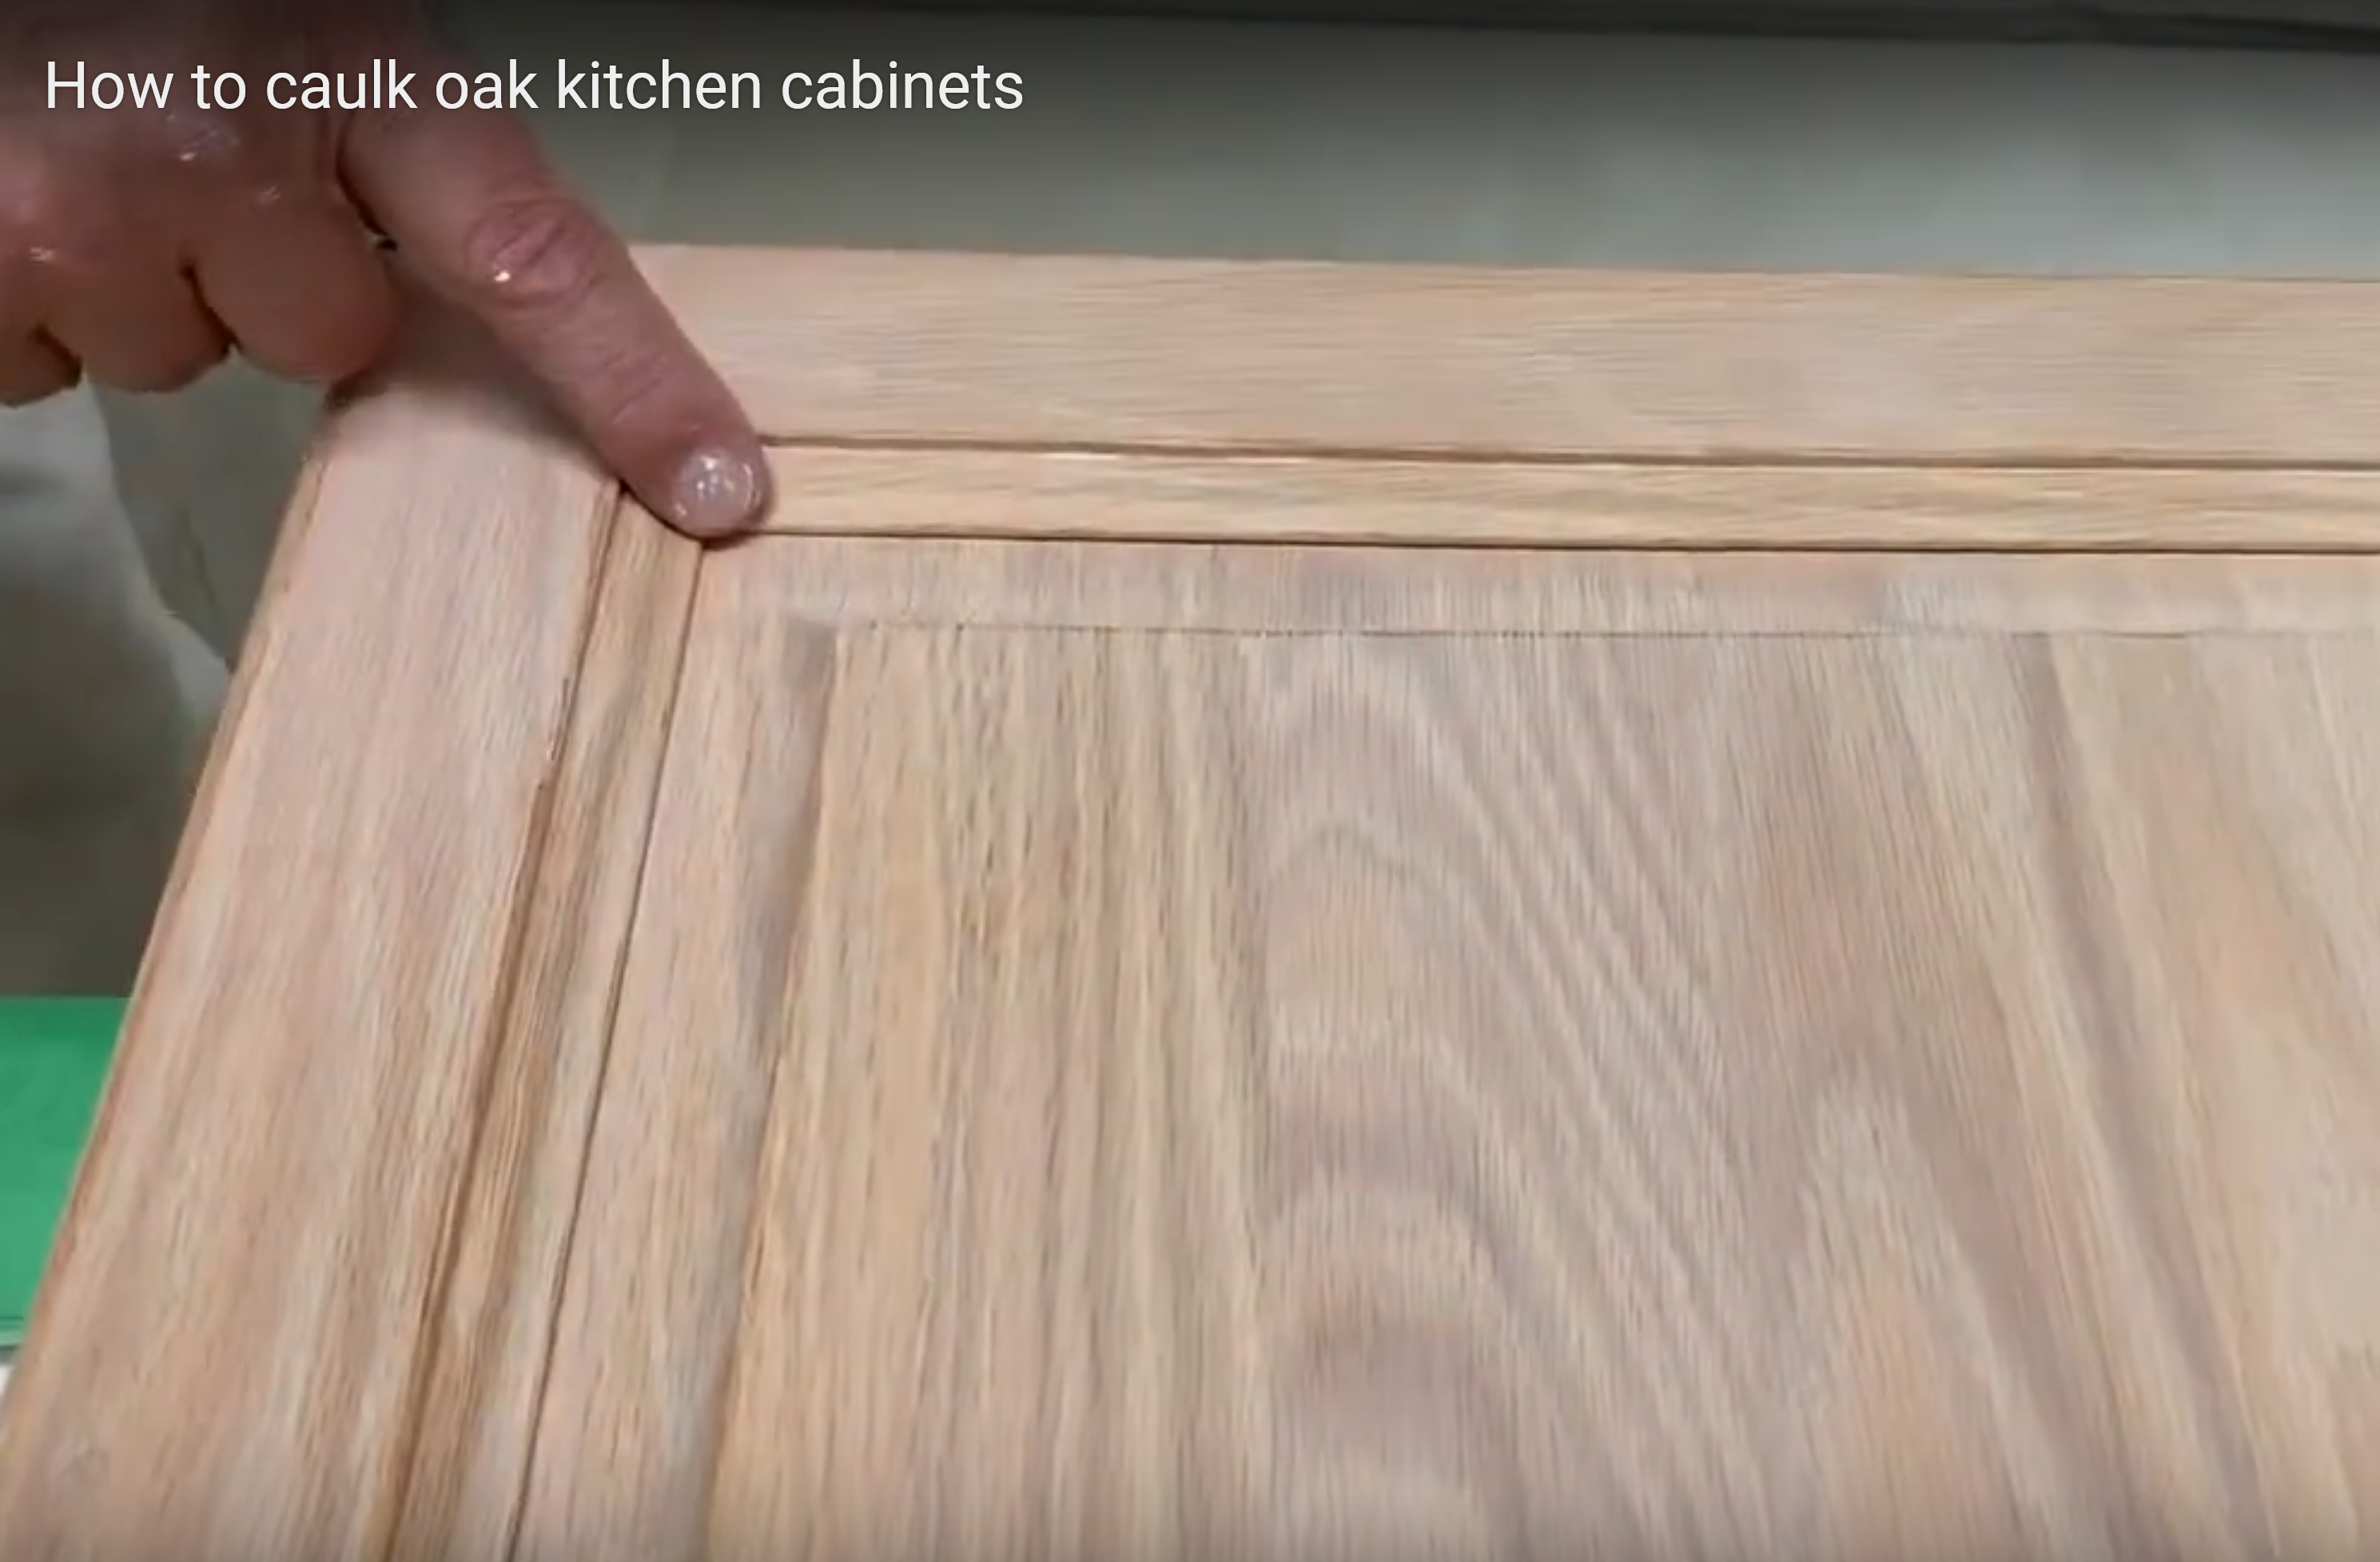
- To overcome these issues we clean the joints, vacuum out dust then hand paint shellac into these gaps and joints. This process cannot be done with sprayers. It must be done by hand.
- After priming we caulk and acrylic paint because these products expand and contract far better than composites, lacquer or alkyds as these products are prone to cracking over time.
Using products that bond and work together prevents down-the-road warranty problems.
Using products that work together is the difference between cheap looking repaints and beautiful long lasting kitchen cabinets that look great for years.
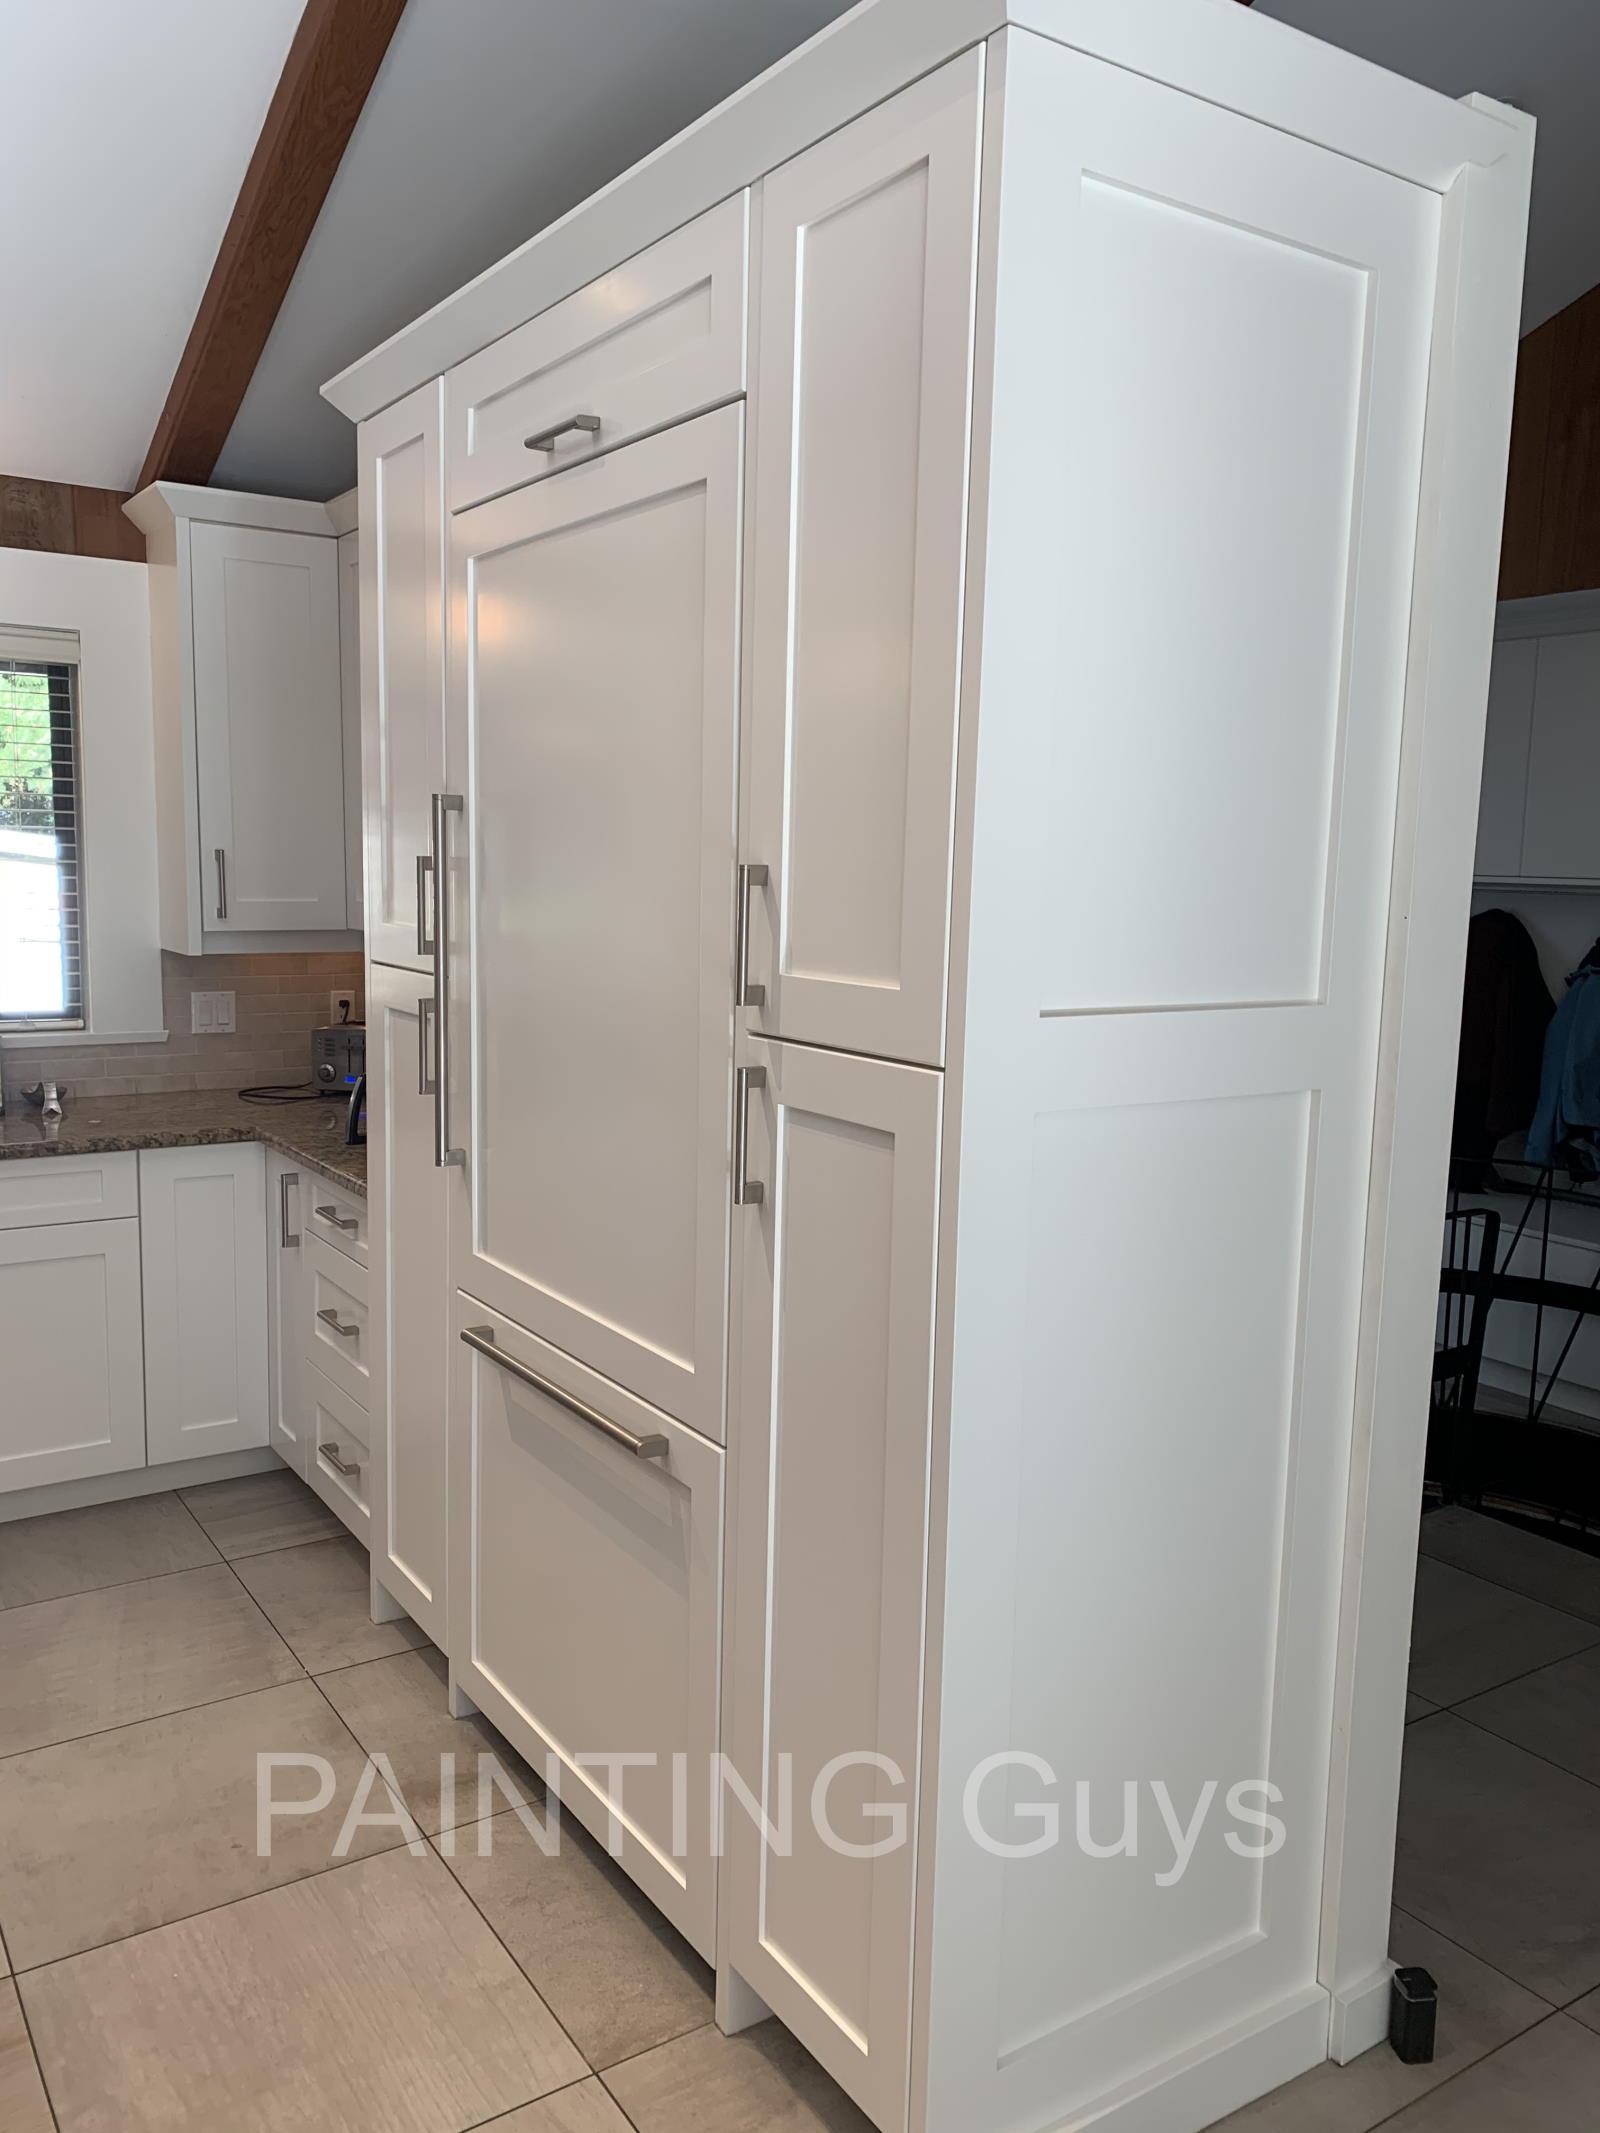
Hand painting sections to match the spray finishing
Part of this beautiful built-in refrigerator cabinet was spray painted and other sections of it were hand painted. Being able to seamlessly paint what cannot or should not be disassembled is why we have decades of thrilled clients throughout Western Canada.
Hand painting the boxes always looks superior. Tape lines on wood look cheap, tend to chip and bleed old stain between the frames and the cupboard shelves. Therefore, it makes no sense to spray cabinet boxes when you still need to paint these areas by hand.
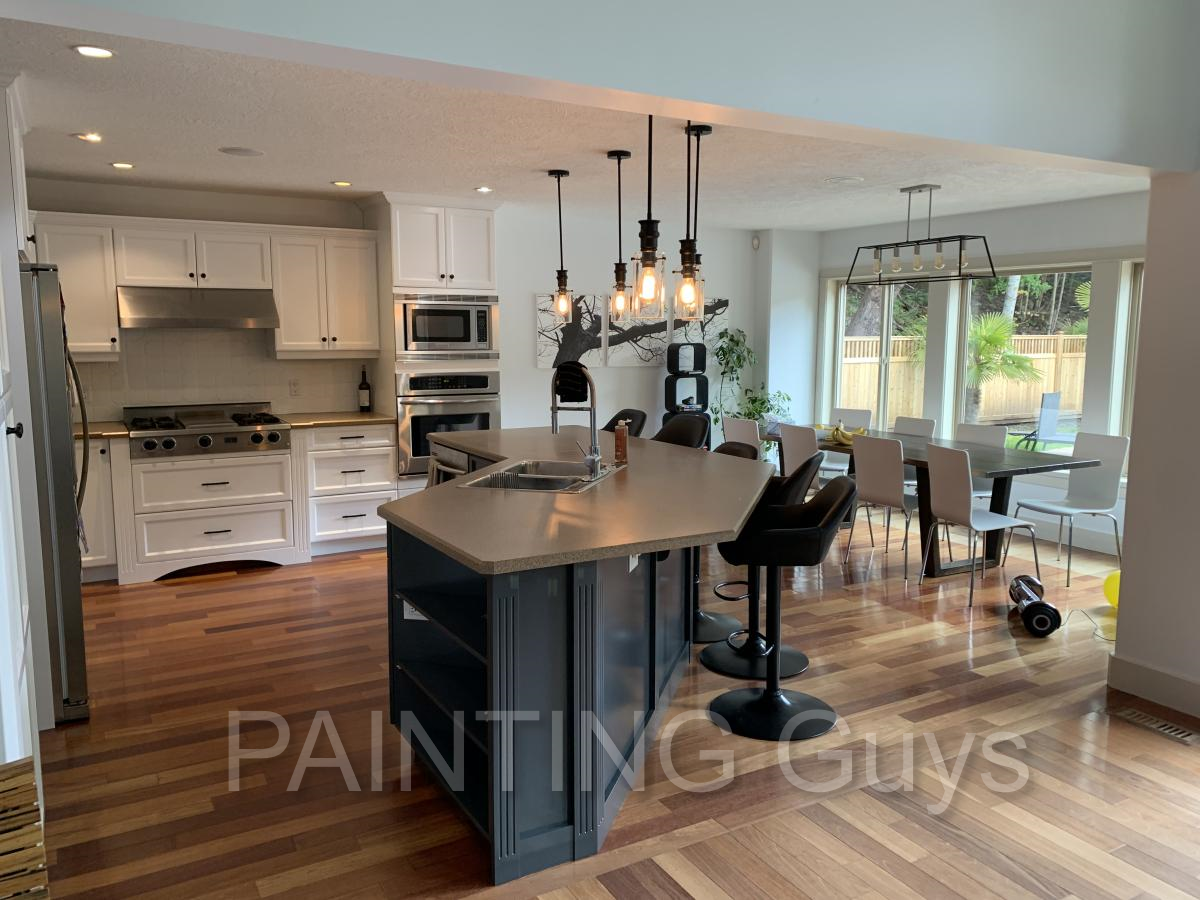
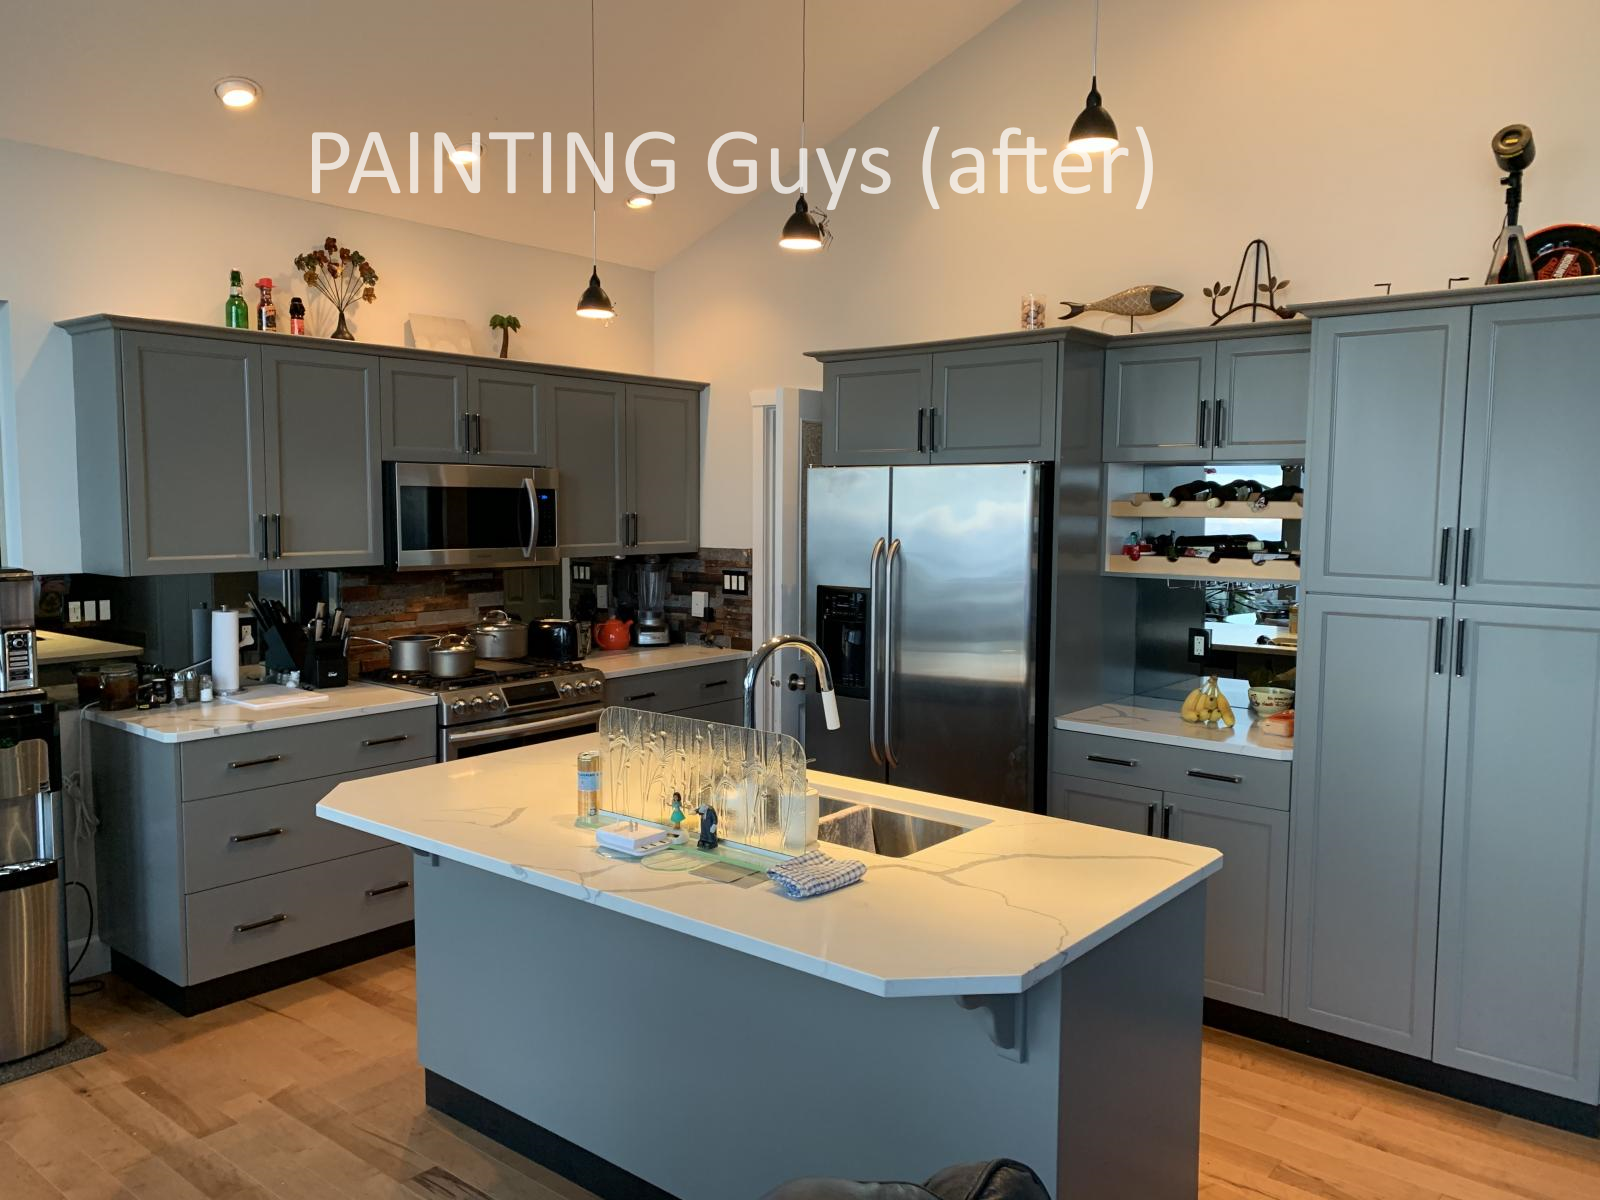
The Finished Product!
On the last day of the process we return back with the beautifully spray painted doors and drawers to complete the finish coating of the cupboards.
Beautiful kitchen cabinet painting