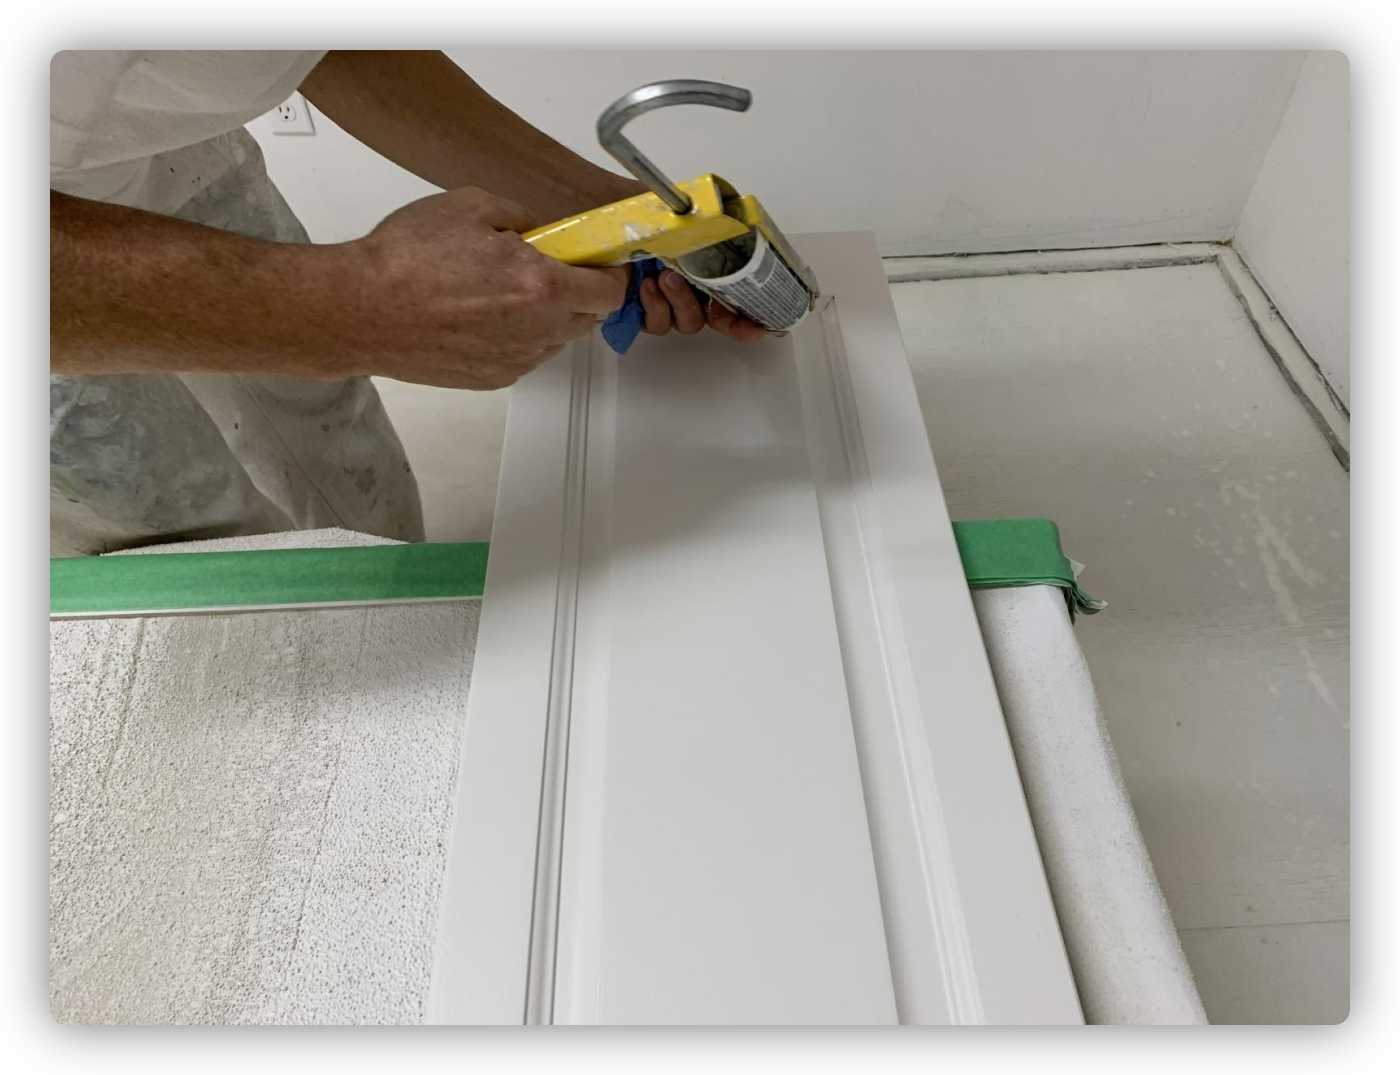
The Art of Caulking Cabinets
When painting kitchen cabinets (especially shades of white), take extra steps to caulk all cracks and seams. It's essential to clean out dirt, dust, or gunk between seams and joints so primer and caulking will stick. It also prevents grease bleed that turns an ugly yellow around seams.
Caulking Pros & Cons
Not all door panels are made the same. Some door panels move inside the frame, which may or may not hold caulking. Just because you can caulk doesn't always mean you should because caulking can work its way out over time. Floating panels or a poorly prepared seam will come loose over time, so it's important the caulk will hold.
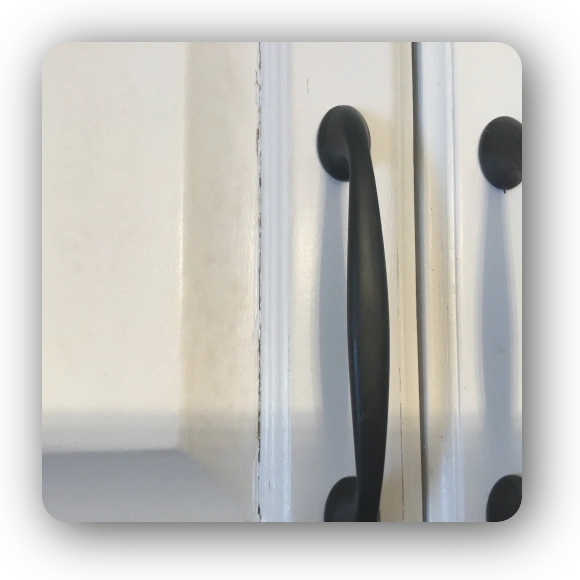
Example of Bad Caulking on Oak Cabinet Doors
Cabinet makers often say... cabinets should never be caulked because the centre panels must be free-floating, or they can split. Some panels are glued or nailed in place, while others are simply floating between the frame.
Based on this, you may or may not caulk. The goal is to do the best job that will last and look great for years.
Use High-Grade Caulking
Using a clean finger, push the caulking into cracks and seams as smooth as possible (clean looking to the corners). Pushing the caulk into a crack reduces the chance of caulking working its way out years later. Caulking cabinets is a very detailed process. Done well, a good caulker makes everything look better. Caulking is an art and should never be thought of as a sloppy attempt to fill in cracks, etc. Good caulking shouldn't be noticeable.
Drying Time
After 24 hours of drying, spray a second coat of primer over the entire door (caulking) so it seals the caulking in, holds it firmer, and flashes less on the finish coat.