DIY Collaboration
Read through this and feel welcome to ask any questions at anytime (before, during or after). Our goal is to help clients save money through a mutual collaboration process.
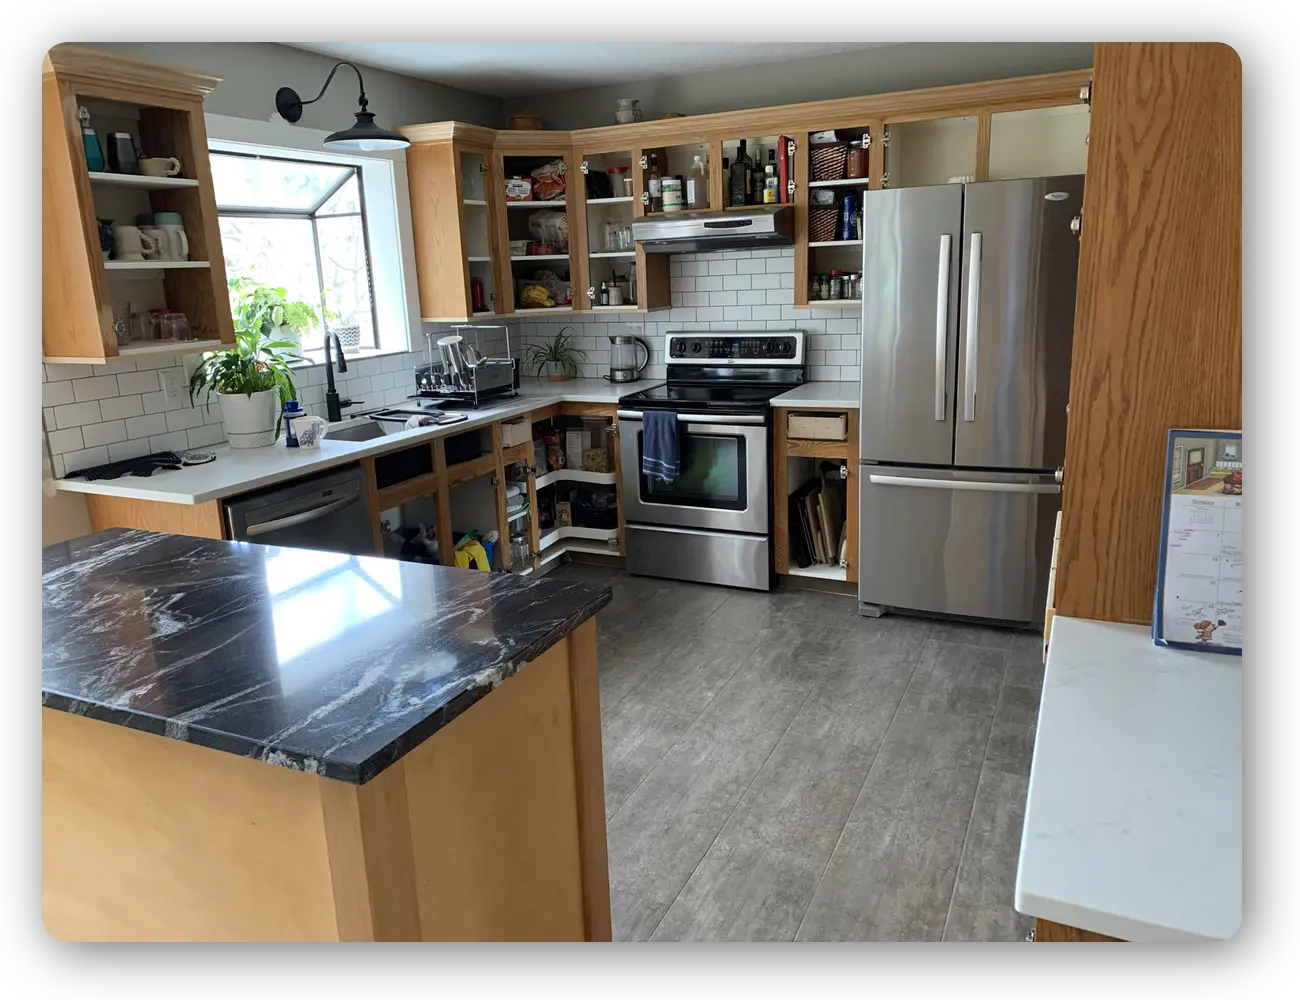
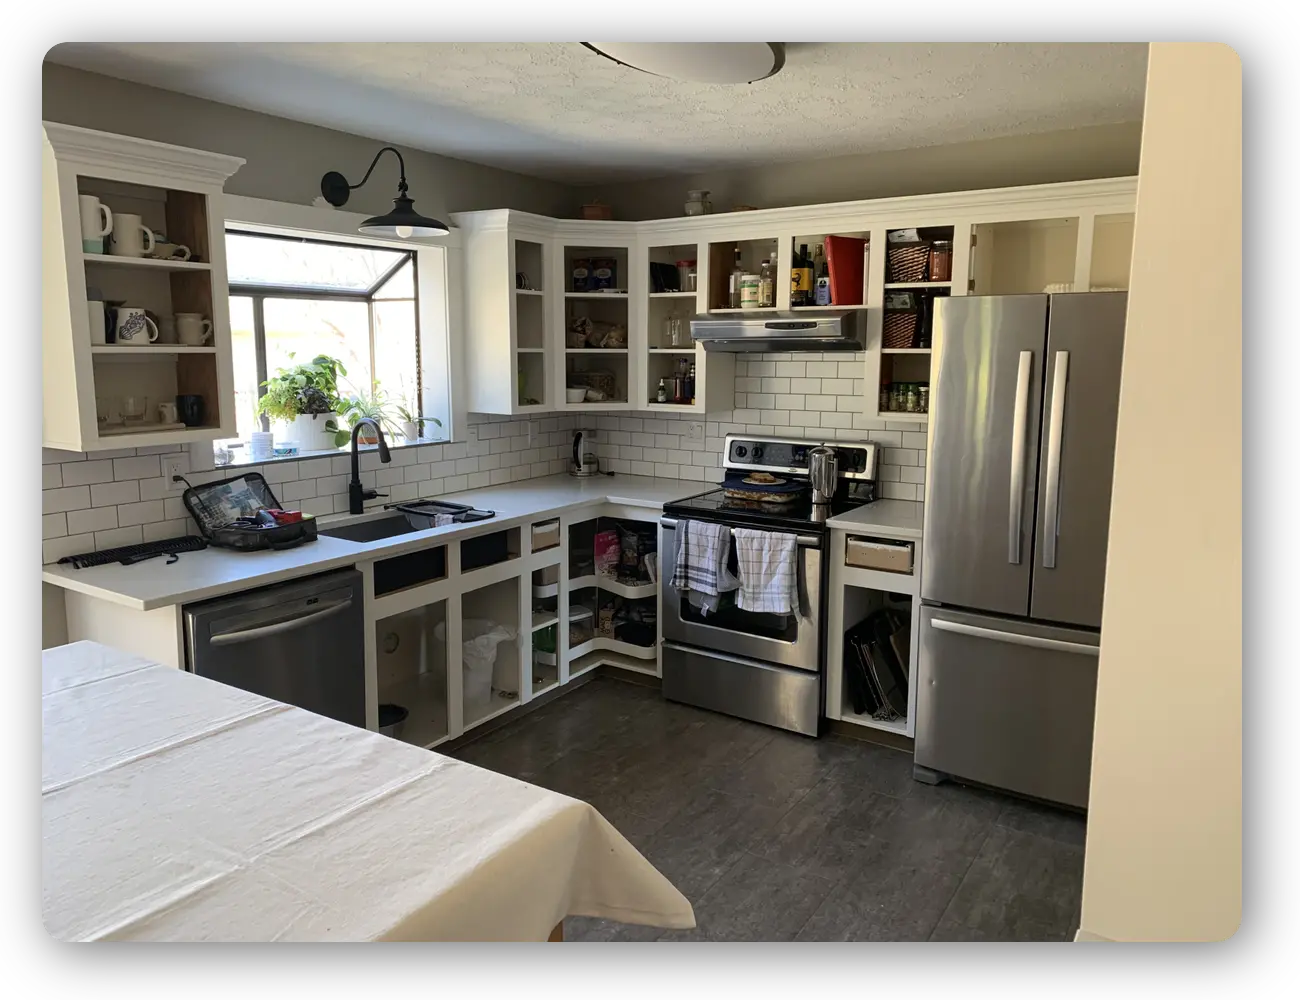
The most visual parts of kitchen cabinet painting are the doors and drawer fronts. Painting the boxes is time-consuming but relatively simple compared to spraying and making the doors and drawers look new again. Any decent painter should have no problem collaborating with us.
If this sounds like something you are up for, below is the general idea of what is required on your end.
Our tutorial is to give clients a general outline and tips on how to collaborate with us to achieve the best outcome (win-win).
How to save some money
Option 1:
Save $300 or more if you choose to only disassemble and reassemble.
Option 2:
Save $700 or more if you choose to paint everything but the doors and drawers.
Below are tips and a basic tutorial on how to do these things for us.
Preparation and allowing time for things to dry are important. Most of what you would be doing is not very visible, but you still need to do basic steps for the paint to bond.
Tools and material you need:
- stable step ladder or stool
- medium grit sanding sponge
- 2 or more 10-mill high-density sleeves (the roller) for the side panels
- 2 or more mini rollers for the face frames
- 2 or more brushes for the detail and cutting in
- paint tray(s)
- rags
- DAP Drydex and DAP 230 caulking
- vacuum
- drop-sheet
- screwdriver
- painters tape
- De-greaser only where needed
- primer and paint to be determined
The time expected to paint your face frames, trim and panels is 3 to 4 days. That is about the same amount of time it takes me to spray everything.
Realistically, you could have new-looking kitchen cabinets in 3 or 4 days!
The Face Frames and panels are what you need to be painting. This part is a relatively simple job but it is time-consuming, which is why you are doing it and not us. This saves you a heap of money if you can do this yourself!
Paint all outside boxes. This includes behind the refrigerator, microwave box, behind the stove, crown, valances, trim, inside cupboards or kick plates.
Steps
- After the cabinet doors and drawers are removed and I have them, thoroughly clean all areas of grease and grime. Pay particular attention to the sections around the stove. Sometimes de-greasers are necessary. You want to be sure there is no grease on the wood because paint doesn't like grease.
- Lightly sand and scuff everything with a medium grit sanding sponge. Sand so you see the old finish "forming dust". This is the indication that you are below the old sheen and into the surface enough for the bonding primer to adhere. NOTE: if the sponge shows grease, then you should stop sanding and deal with the grease. Don't expect to sand grease off. It's much faster de-greasing. You do not need to keep sanding the older finish to a point where you are into bare wood. The idea is to prepare the wood for the bonding primer to stick, not to sand down to bare wood.
- Dust and vacuum everything including cracks well. We want the dust out of cracks so the primer followed by filler will stick inside it all and look smooth and pro at the final coat.
- Prime everything you want to be painted by hand using the appropriate brush and fine nap rollers. You may want to tape off certain areas. The primer you choose must be a high-quality bonding primer. Some primers take longer to dry than others. I generally use one of three products which I will recommend for you.
- Once you are certain the primer is dry, fill in all visible cracks and damages you see after priming. I generally use caulking for seams and cracks and Drydex for nicks on flat areas. caulking is an art in itself, a wet rag is a good time to have handy so you can wipe any extra off. Let the filler dry for 24 hours or when sure it's all dry. NOTE: After the first priming, you will see cracks better. If you see anything missed that requires attention to detail, repeat all 5 steps until you know the Face Frames look ready for the finish coat. Preparation is most important so make sure you do this well.
- FINISH COAT!: Use matching high-quality Satin or Semi finish paint used for the cabinet doors. Coats vary in technique and aesthetics.